Day 21: Adventures in 3D Printing for Beginners - Prusa Slicer and OctoPrint

After Day 20: Adventures in 3D Printing for Beginners - A Total Meltdown with major layer adhesion issues coming out of the blue, I took a break for a half-a-day. In my sleep, I decided the best way to begin to isolate this new rouge layer adhesion problem was to install a different slicer and print using a totally different software environment. If the print still has layer adhesion issues, we know it is a hardware issue. If the print turns out good, we will learn it is more-than-likely an issue with the slicer I have been using, Cura (maybe some setting, configuration or update issue).

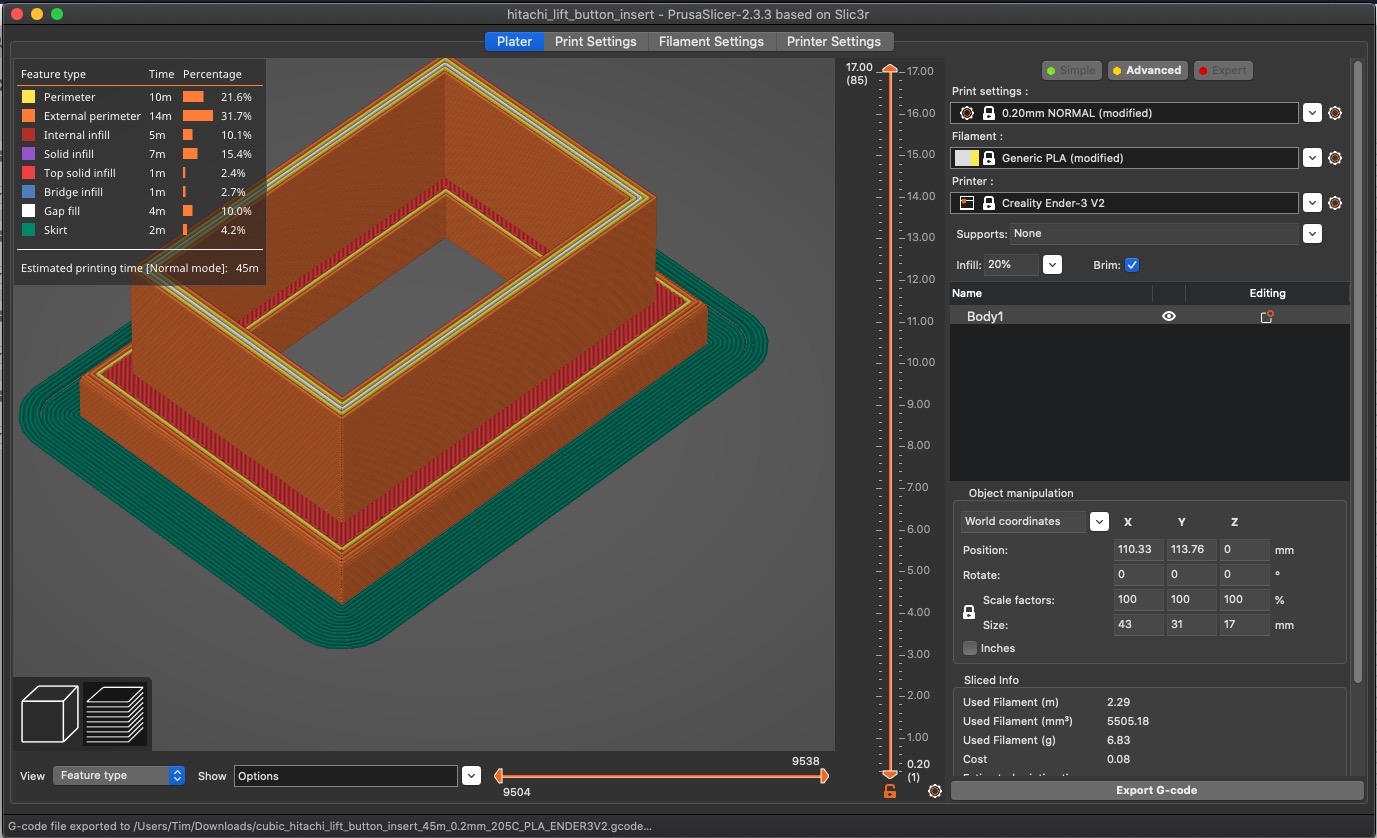
I decided to go with the https://www.prusa3d.com/prusaslicer/ for macOS based on Slic3r, because I could not get Slic3r to install and run on my 64-bit macOS. I installed the Prusa slicer, and the slicer installed easy enough on macOS; and followed the initial setup

When I went to print using Prusa, I noticed that I could only export a GCODE file and not print directly to my printer. A little research showed that Prusa wants us to use printer software from https://www.pronterface.com/ but this printer package complained I was on 64 bit machine and the PronterFace software only works on 32 bits (at the time of this post).

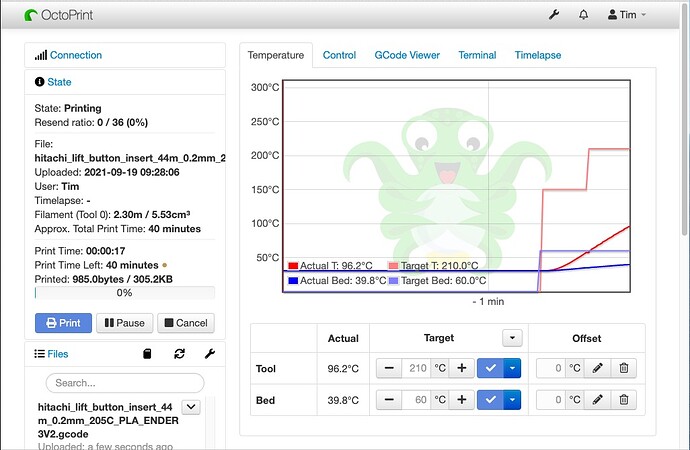
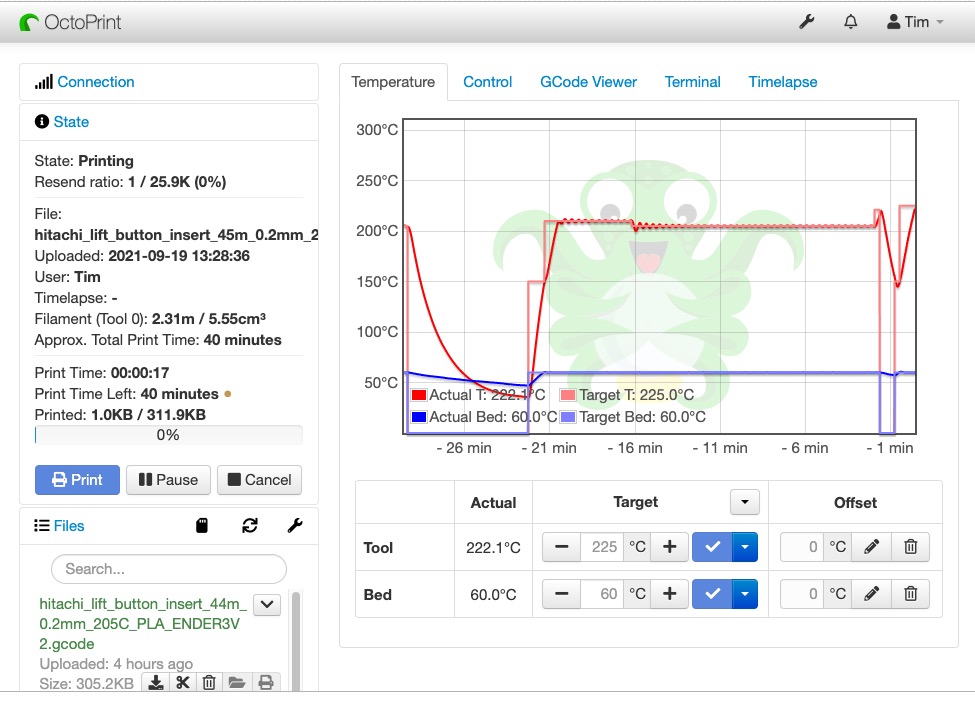
After that, I decided to installed OctoPrint, https://octoprint.org/, a Python-based 3D printer very popular with DIYers and 3D print-farmers. I followed the tutorial Setting up OctoPrint on MacOS and after updating Python and setting up all the basics, OctoPrint was up and running:

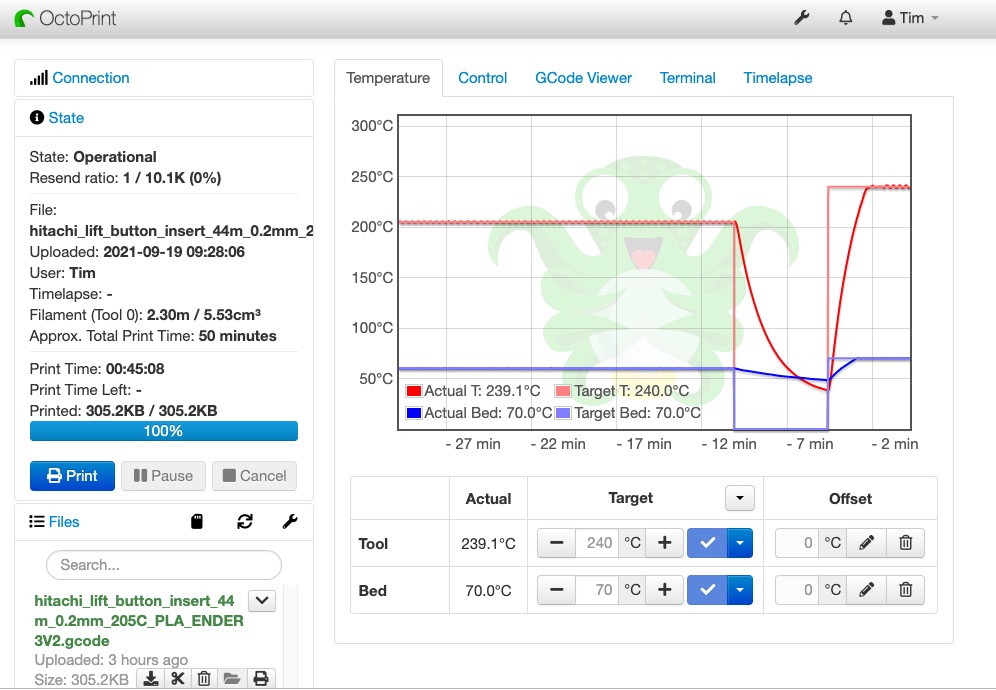
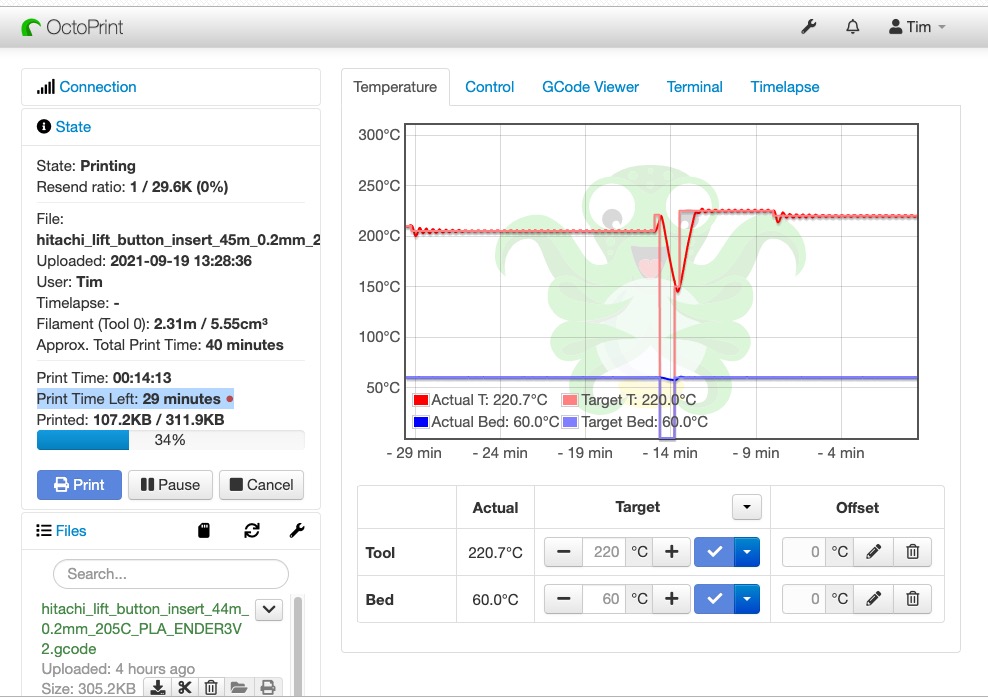
At this moment in the space-time continuum, there is 14 minutes left until this test print with new slicer software and and a new printer software is done:

My first impression with the Prusa slicer is very good and I'm going to stick with the Prusa slicer for now. I like the dark mode (which Cura does not have) and the zoom function (camera perspective) works better than with Cura. Cura is still very good, do not get me wrong. However, the Prusa slicer is looking promising because of dark mode and the nicer zoom.

My first impression with OctoPrint is that this is truly a "community-based" Python application and it is a lot more time-consuming to install and get OctoPrint running than the very slick Cura slicer (which also can print), but on the other hand, I like the web-based interface and the "in your face" bare-bones DIYish control and the ability to add a webcam to OctoPrint to keep an eye on prints remotely. It looks like OctoPrint will give a DIYer a lot more control over the details of the actual print process and this can only be good, right? After all, I'm now three weeks into this new "3D Printing Mania" project, having already printed nearly 1KM (3KG) of filament so far; and so I am not really a complete noob at this point, am I?

Sidebar: My wife is actually glad the printer has problems so she does not have to compete for my time with 3D printing 24 hours a day!

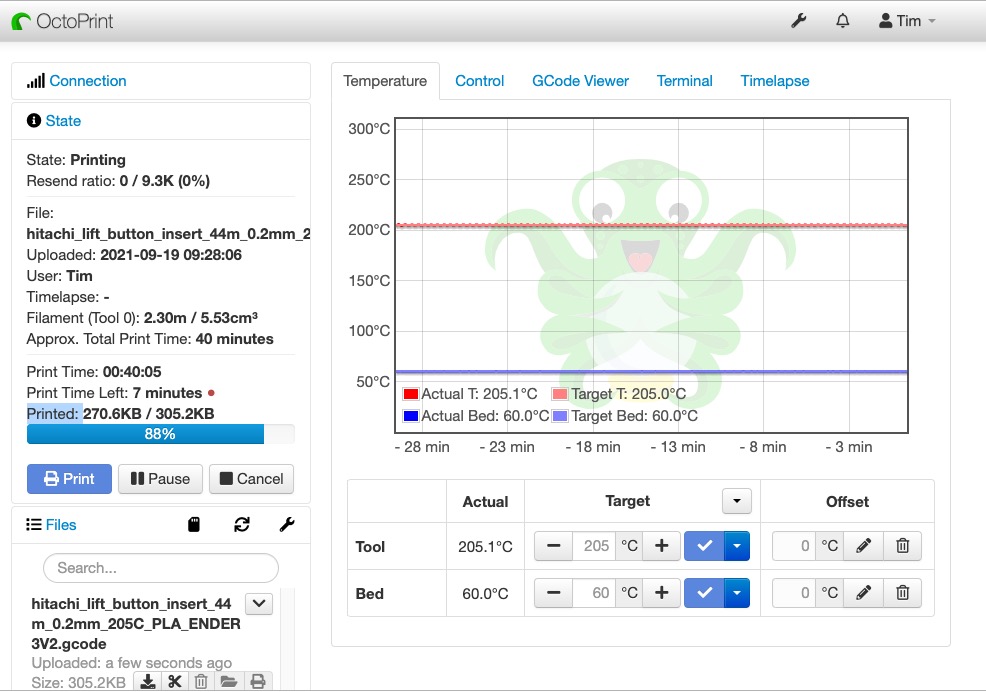
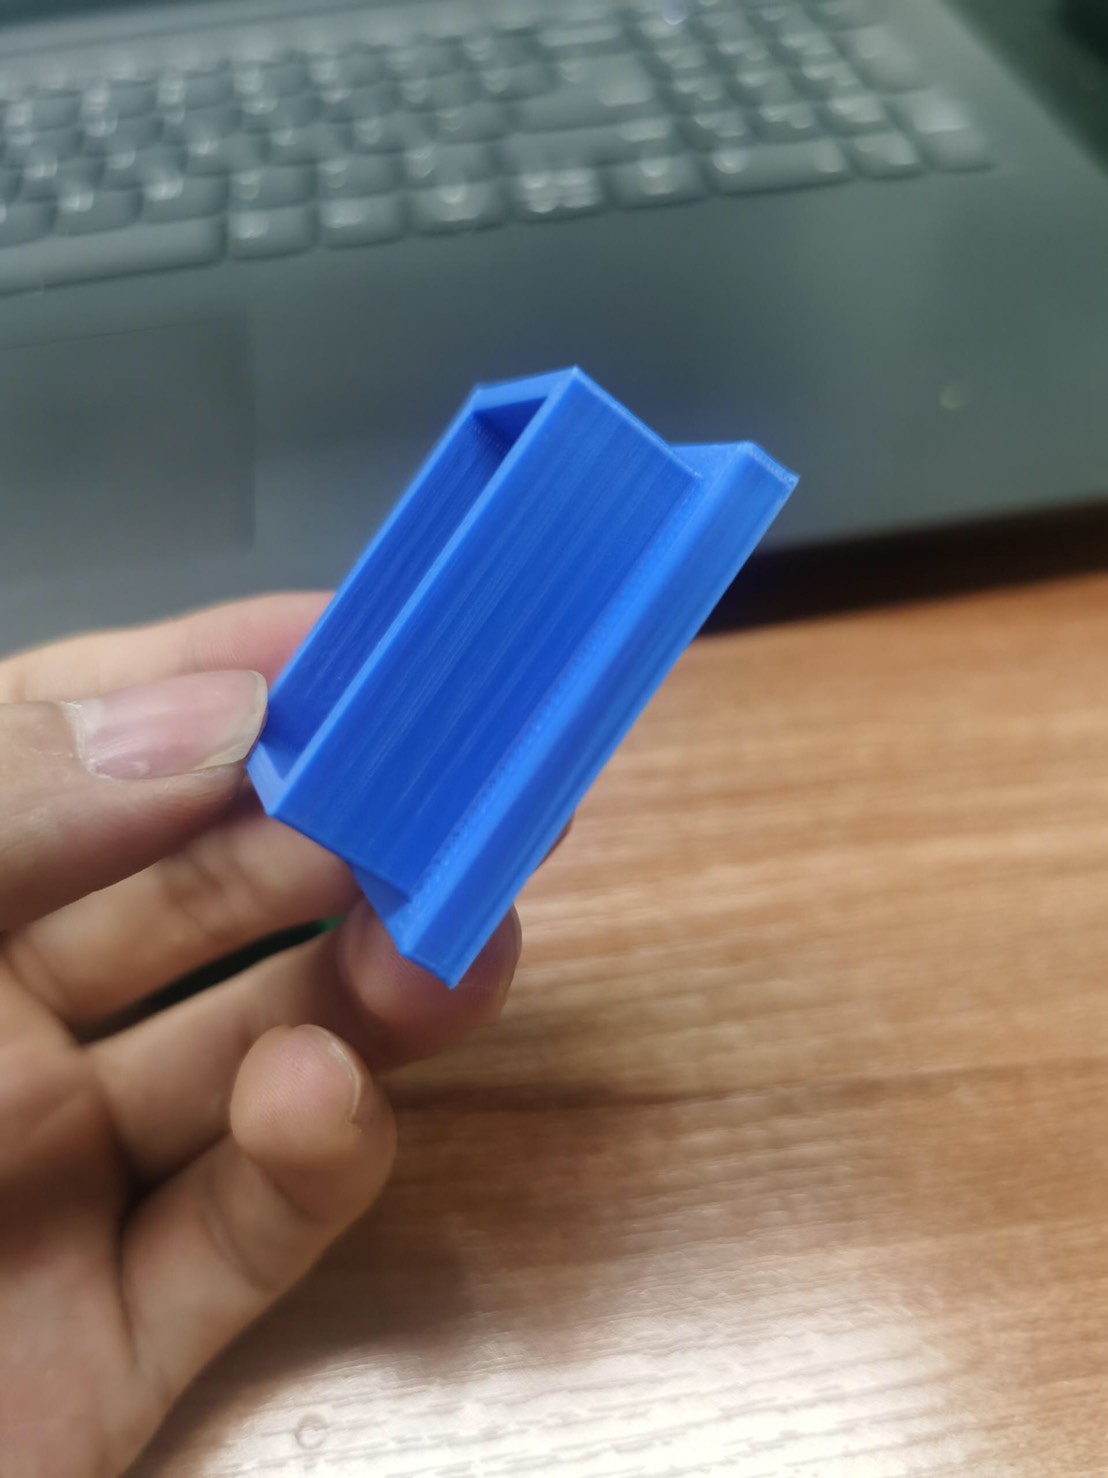
With only a few minutes until touchdown on this test print, things do not look good. As you can see from this quick picture "on the bed" we can see the same layer adhesion problem from Day 20:

We are now close to T minus 7 minutes for this test print, and as the quick peek above shows, the layer adhesion does not look promising, and I'm thinking there is definitely a hardware issue with my 21 day old Ender3 V2, I'm guessing there is some clogging in the extrusion tube or extruder.

Should I be doing this analysis on YouTube, or just keep the analysis raw like this in a forum? I think it does not matter if I post here or on YT. I have few YT followers on my YT channel and making videos takes a lot of time. I'm not interested in wasting precision time making videos when it's easier to just do the analysis live in our community forum.

Sidebar: For all those who love making YT videos, you have my admiration because I know how much work making videos can be; and it takes a great deal more time to make a video ready for YT than it does to actual do the work for sure. I prefer doing the work and not spend time making videos. My bad, I know.

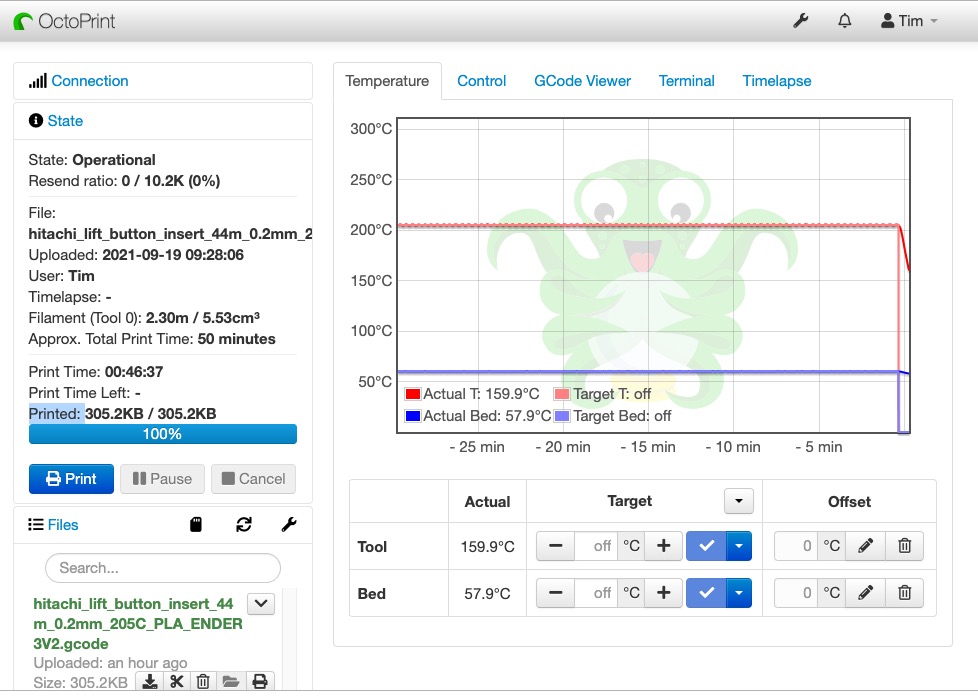
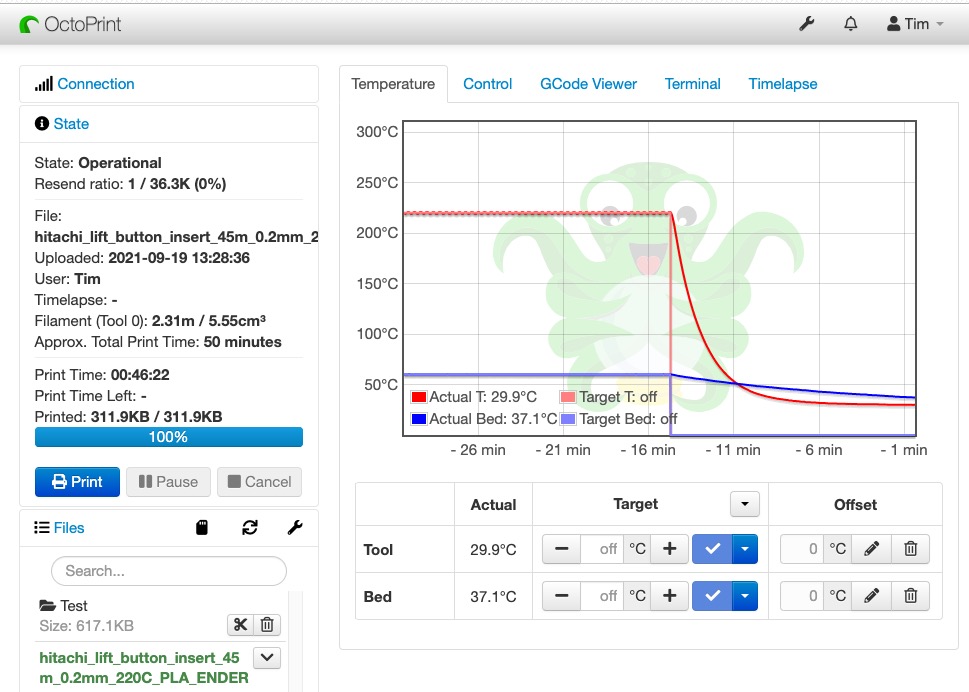
The test print is done!

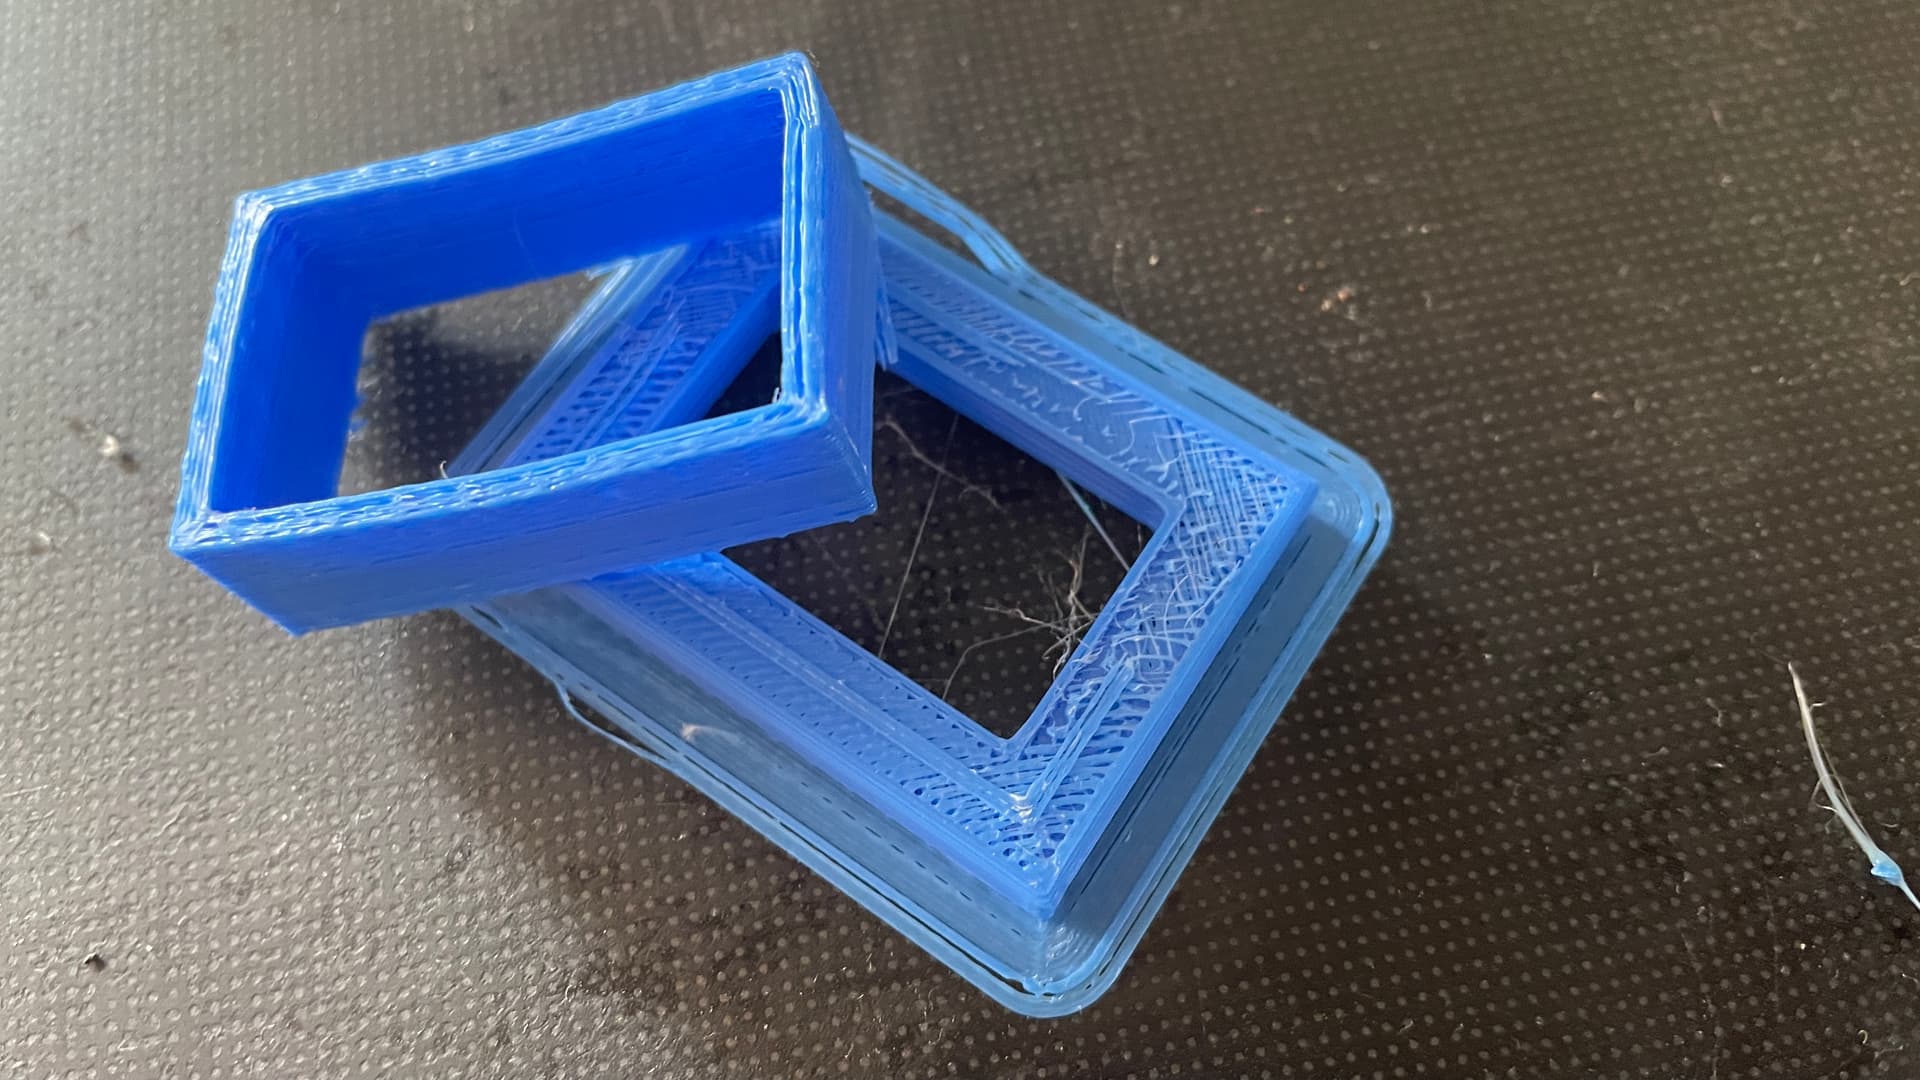
The results are basically the same, bad layer adhesion, so I think we can safely conclude this layer adhesion issue is a hardware issue and not a software issue. We get the same results (poor layer adhesion) with both software setups:

  1. Cura slicer (with built in printer)
  2. Prusa slicer with OctoPrint

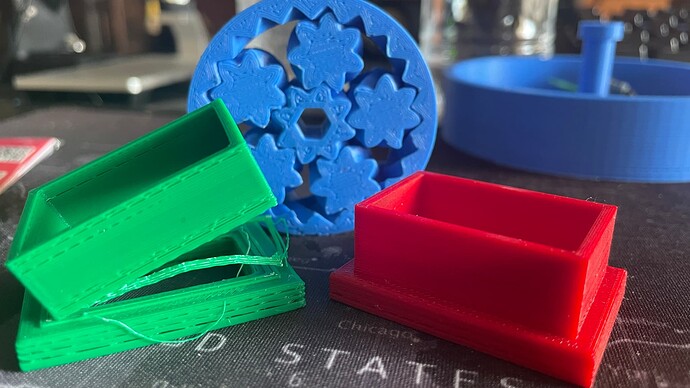
This "new software" test print fell apart just trying to pull the print off the bed:

The good news is that I have installed the Prusa slicer, which I like; and also OctoPrint, which is interesting.

Also, we now know to a strong degree of certainty that the issue is more-than-likely related to hardware and "just changing the nozzle" yesterday did not solve this Day 20 problem with layer adhesion. This is just a wild guess, but I'm guessing my switch from PLA to PETG and back to PLA may have caused the clogging, but I could be wrong.

With the super popularity of 3D printing and video tutorials on every aspect of this topic, I have not actually seen any video tutorial or post which has gone into this level of detail and analysis on an actual printing problem. I hope this "live blog" is useful to other makers, especially beginners to 3D printing.

Next, I need to disassemble the extruder and look for clogs or flaws; and to be honest "clogging" was not on my list of the top 10 reasons to love 3D printing!

That's all for now.

See also:
octoprint

Just got some unexpected test results!

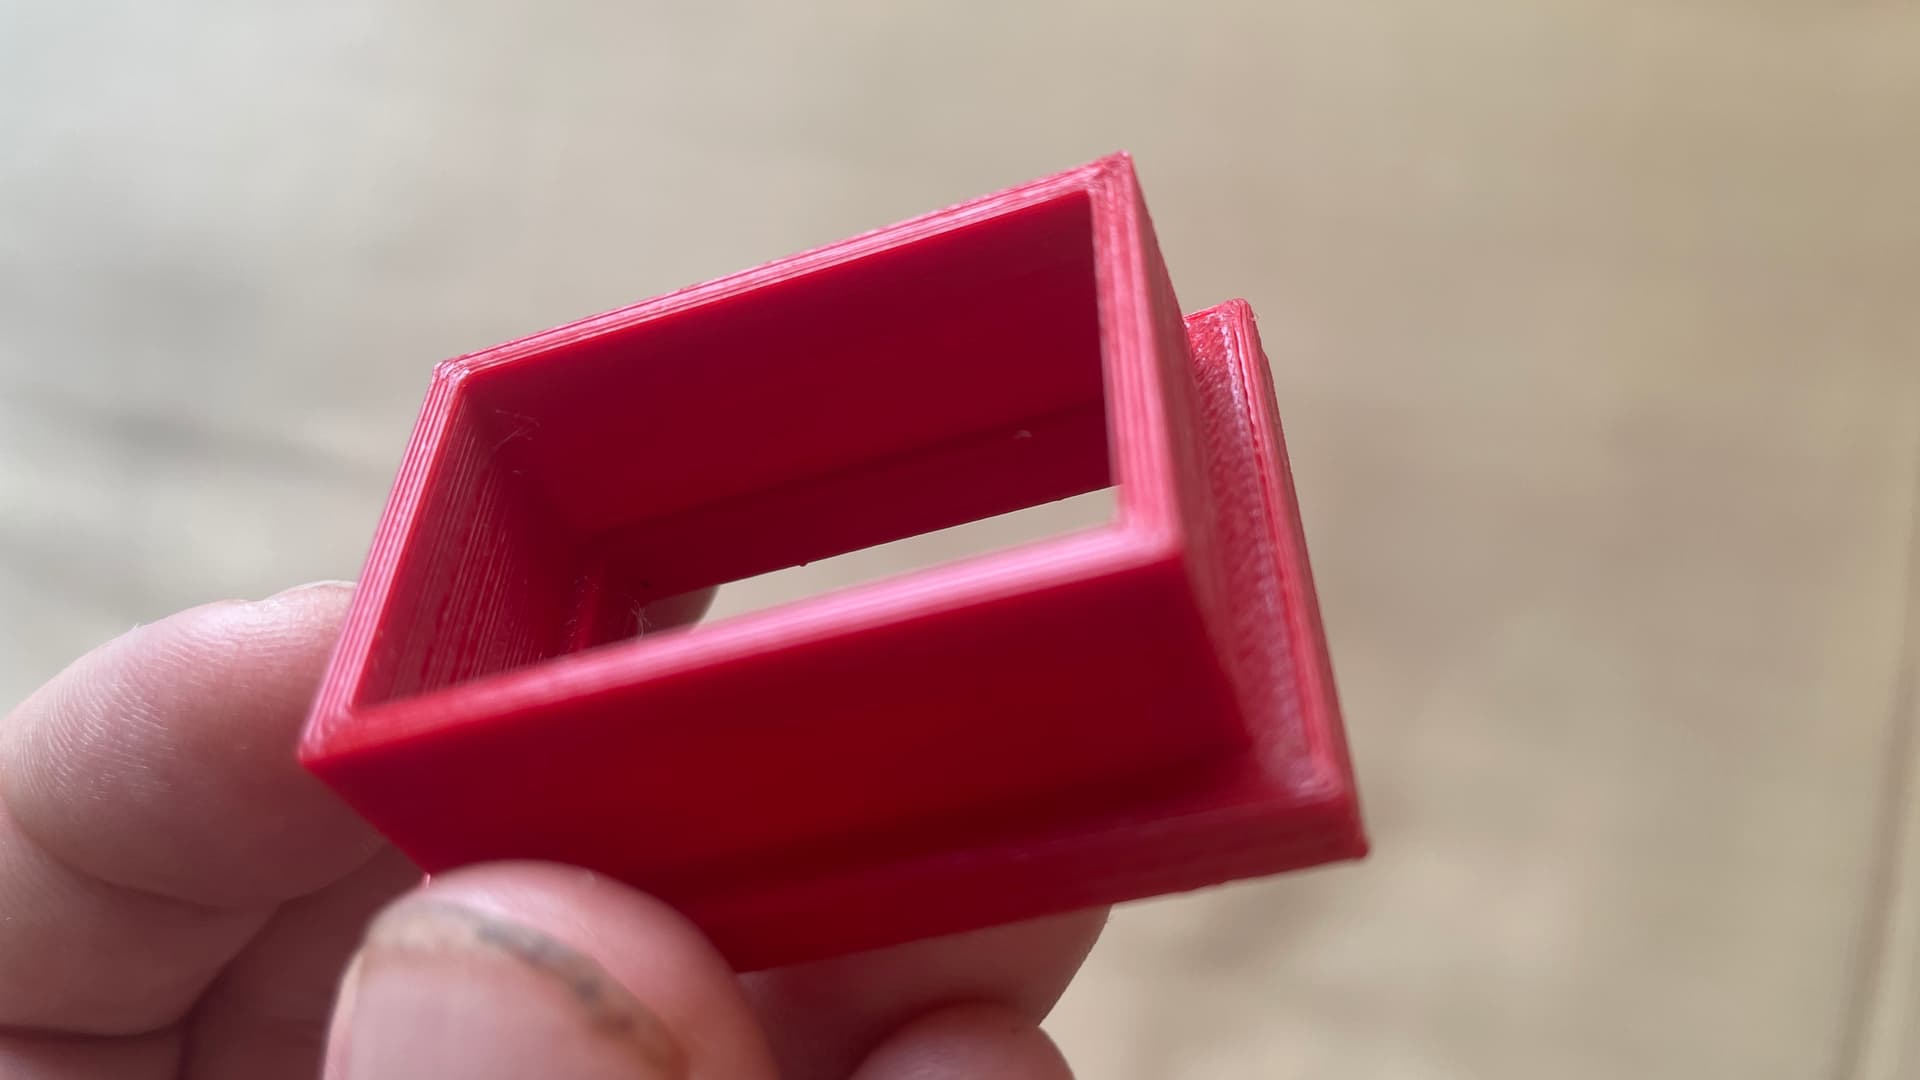
On a whim, I decided to print the same model loaded into OctoPrint using esun PLA+, Fire Engine Red (before taking apart the extruder and cleaning it). I thought, no way I will get different results; but to my surprise, I got a nearly perfect print, very strong (relatively speaking) with zero layer adhesion issues. I cannot crush this print with my bare hands. This result was totally a surprise, really.

Simple Model in Fusion360 (see footnote)

OctoPrint Finale

This result is completely unexpected. I expected the same layer adhesion problem with esun PLA+ that I have experienced with my last 3 Bing3D PLA-F prints (green, black, blue).

Now, I have reloaded Bing3D PLA-F (Green) and will print again and see what happens.

Will the layer adhesion problem go away, or will it be the same?

My guess is that the layer adhesion problem will be gone; and that somehow the problem has corrected itself. There is just about zero chance that 2 spools of Bing3D PLA-F (Black and Blue, just a week old) and a brand new spool of Bing3D PLA-F (Green) all just suddenly had material issues.

Maybe there was a clog in the extruder and the clog has worked its way out, like a kidney stone?

Anyway, let's see in 40 minutes from now....

Footnote:

If anyone is wondering about this model. This model is a rear insert I designed in Fusion360 as part of a three component CAD design, a replacement lift button housing for a 40+ year old Hitachi elevator. The rear insert is used to hold the printed circuit board securely in the housing so when "bad actors" vandalize the buttons (strange that people like to abuse elevator buttons, isn't is?), the PCB will not push out of the housing.

A shout out to Bing3D for taking the time to print and test this print in their labs with Green and Blue PLA-F.


Bing3D printed at a nozzle temp of 220.

Just completed a test run of Bing3D PLA-F at a nozzle temperature of 205 (which was the same as esun) and not recommended by Bing3D. Bing3D recommends 220 - 230.

The layer adhesion at 205 was poor, and so I will retest at 220.

205 degrees C

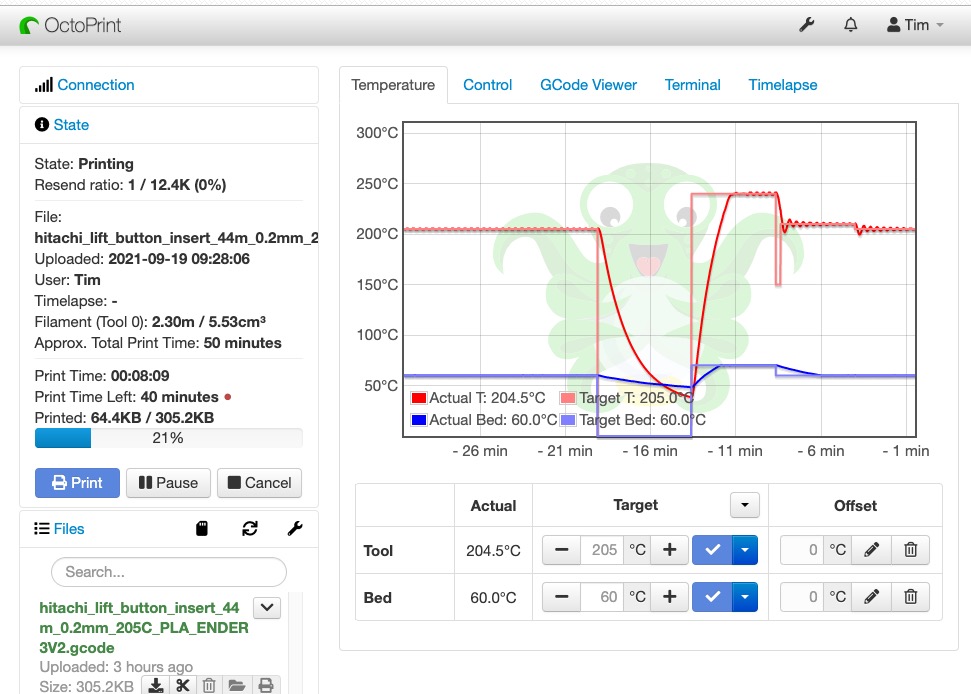
So, now I am printing Bing3D again at 220, again 20% cubic infill, bed 60 degrees C:

Let's see if we get better layer adhesion this time when this new test print at 220/60 finished in 40 minutes....

Footnote

Side-by-side:

  • Red: esun PLA+ temperature 205/60 20% infill
  • Green: Bing3D PLA-F temperature 205/60 20% infill (note: 205 is not recommended by Bing3D)

NEXT .....

Let's see how Bing3D compares when we print at the recommended 220/60 degrees (now printing).

Bing3D uses a different formula than esun and so the very helpful Bing3D team kindly has informed me that they require a higher nozzle temperature for layer adhesion (minimum 220).

As far as software goes, I'm really getting into OctoPrint.

I feel like I have a lot more control over the print process using OctoPrint versus the built-in Cura printer (the printer functionality, not the slicer, that is a different story).

Also, I like the Prusa slicer as well; but so far have not really done any thing advanced with the Prusa slicer. The dark mode is easy on the eyes and, as mentioned, I like their zoom. I also set the first layer to print at 225 degrees C and the remainder of the model to print at 220.

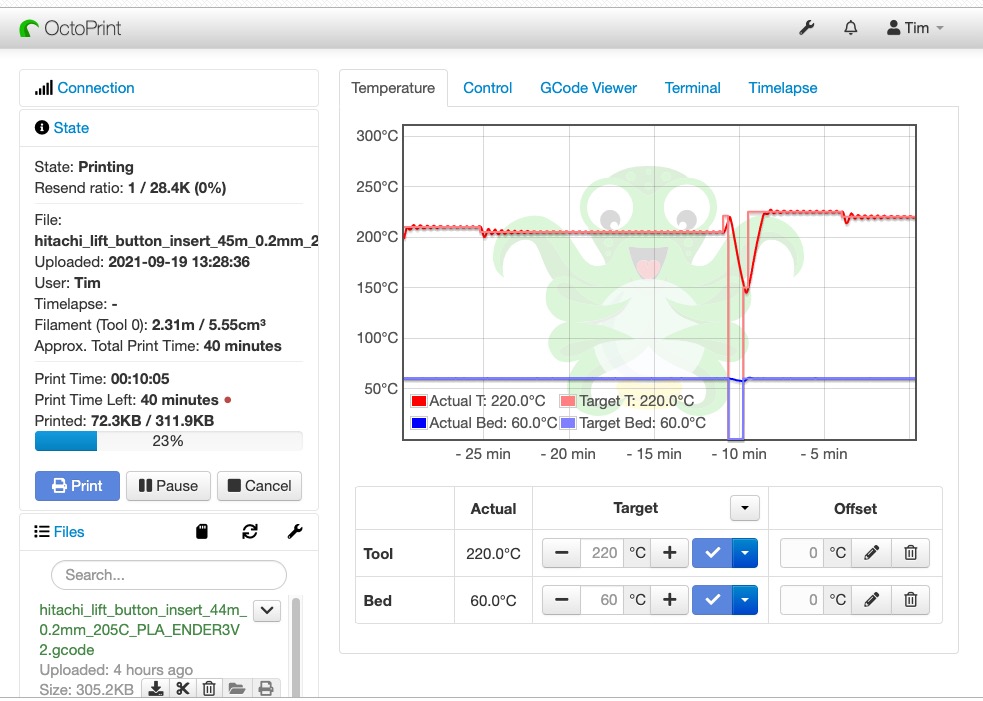
Print Time Left: 28 minutes on the Bing3D print test at 220 degrees C.

1 Like

Bing3D PLA-F @220

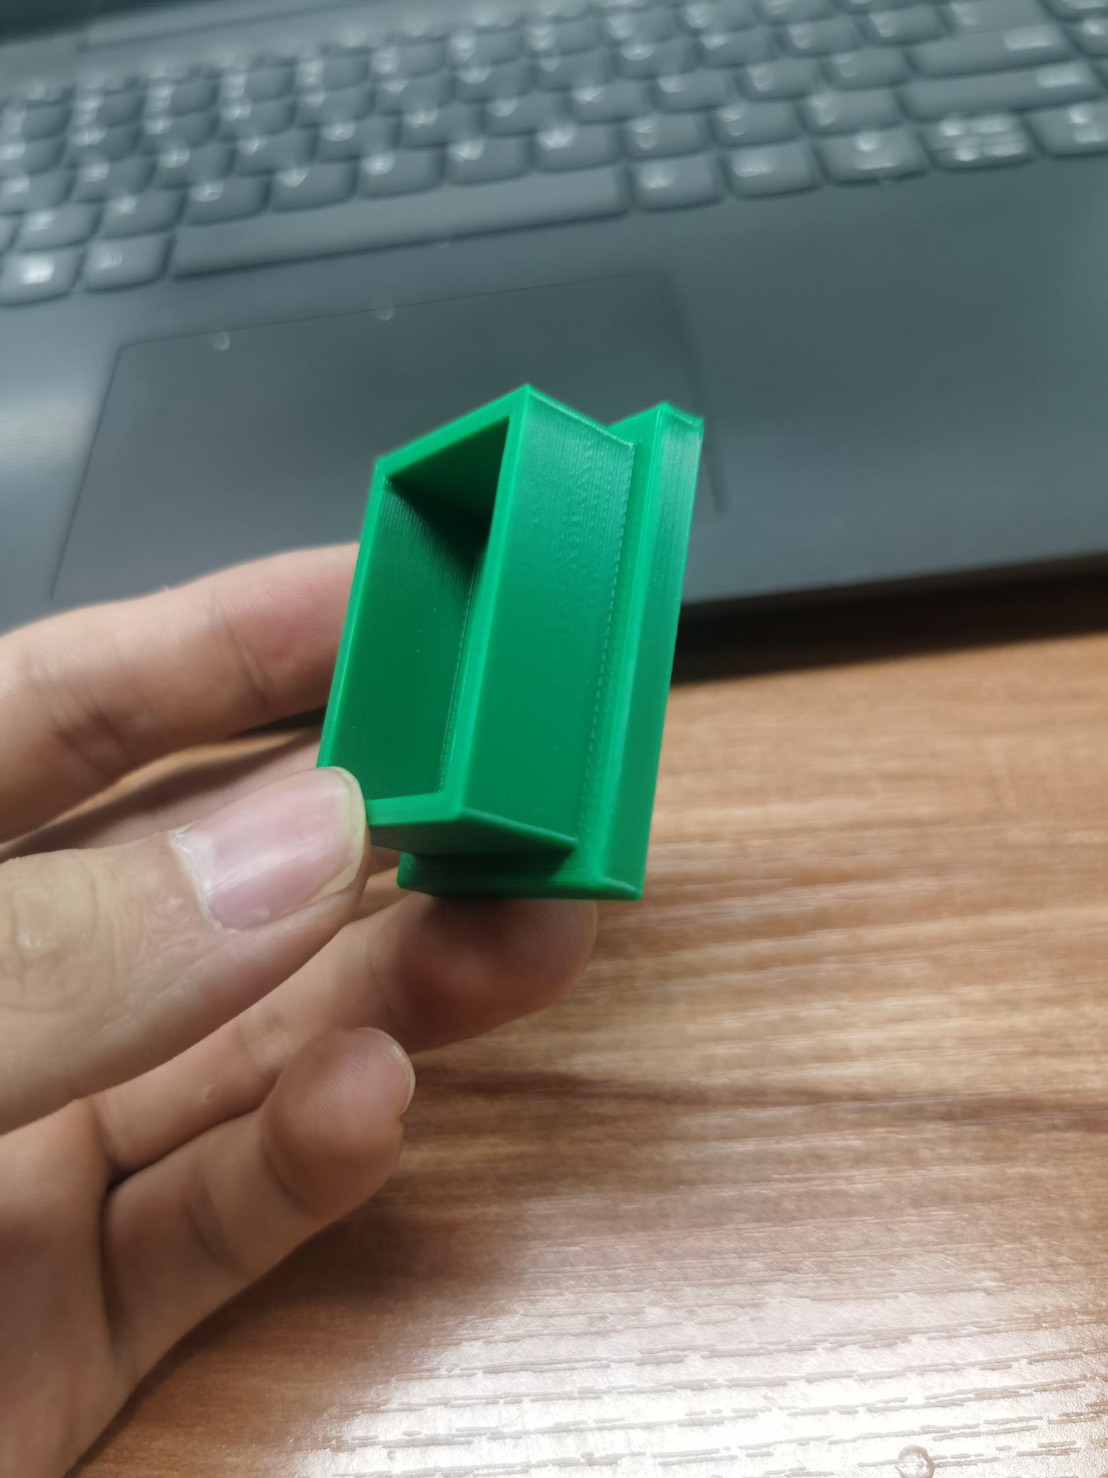
I bumped my Bing3D PLA-F nozzle temperature to 220 (at Bing3Ds recommendation) and got a nice print again.

On the picture below, the print on the left is esun PLA+ Fire Engine Red at 205 degrees C on the hot end. The print on the right is the Bing3D PLA-F Green at 220 degrees C on the hot end.

Both prints are OK; but I noticed (unexpectedly) the esun was "harder" and "stronger" compared to the more flexible Bing3D print. This adventure was never meant to be a head-to-head Bing3D v. esun matchup. I do not have the depth of experience to perform these kinds of material tests (yet). In addition, I don't have any experience with esun's customer service; but Bing3D has great customer service and stood by my side every step along the way since this problem materialized, yesterday. Bing3D team members very encouraging and helpful.

I leaned more than I bargained for after yesterday's Day 20: Adventures in 3D Printing for Beginners - A Total Meltdown which I will summarize as follows:

  • Bing3D has great customer service and they worked with me side-by-side, step-by-step, though this the process of figuring out what went wrong (I'm still not sure, but my guess it was a nozzle clog which finally worked it way out of the extrusion system after running a number of test models though the extruder).

  • The Prusa slicer is a very good slicer and is certainly a peer to Cura on macOS. Cura has the advantage of sending GCODE directly to the printer, where the Prusa slicer requires some external print software. On the other hand, the Prusa slicer has a nice dark mode and I'm a big fan of dark mode (easy on the eyes). In addition, the Prusa slicer has a "better" zoom mode, but again this is only a matter of personal style and taste.

  • OctoPrint is really great community-ware 3D printing software. The temperature graph of the hot end (the nozzle) and the print bed are very useful when printing. OctoPrint, therefore, gives more control over the print processing versus the built-in print feature in Cura. I'll probably stick with OctoPrint going forward.

  • esun PLA+ Fire Engine Red prints very solid with no issues of with layer adhesion at 205 degrees C. The print is very hard and strong.

  • Bing3D PLA-F Green prints nicely at 220 degrees C (the factory recommendation is 220 to 230) and the results seem more flexible but less strong (a typical trade off in materials) when compared to esun.

  • Bing3D is currently about 20 to 25% less expensive compared to esun (from Shopee and Lazada this season) so for prototyping and modeling, Bing3D will save maker's a lot of money.

  • esun might be a better choice for functional parts which do not need to be flexible and require greater strength and hardness, where cost is not an issue; but more testing is required.

I want to thank Jason Chan and the entire team at Bing3D for the top-of-the-line customer service. I never thought BIng3D would have such great customer service for a "hobby shop" maker. Here is the Bing3D direct LINE customer service contact information if you have any questions about 3D printing filament.

Screen Shot 2021-09-19 at 3.10.11 PM

Thank you again Jason and Bing3D. I am a fan now.

I hope this play-by-play detailed analysis is useful to other DIY makers. My apologies for not taking time off to create YT videos; but if I start making videos, I will stop making and doing analysis; and I prefer engineering, making and analysis versus producing and polishing video content.

1 Like