Day 22: Adventures in 3D Printing for Beginners - Customizing OctoPrint

Yesterday we worked to fix a meltdown in the printing process, which seemed to be caused by clogging in the extruder mechanism. As a part of the troubleshooting process, I switched from Cura to the PrusaSlicer and OctoPrint.

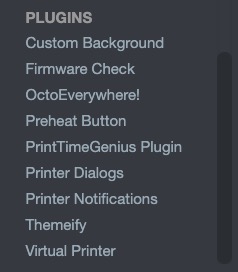
Today, I'm printing some small prototype Hitachi elevator button housing replacement parts with Green PLA-F from Bing3D. In between prints, I added a few simple plugins to OctoPrint (we cannot install plugins while printing), including:

  • Custom Background
  • OctoEverywhere!
  • Preeheat Button
  • PrintTimeGenius
  • Themeify

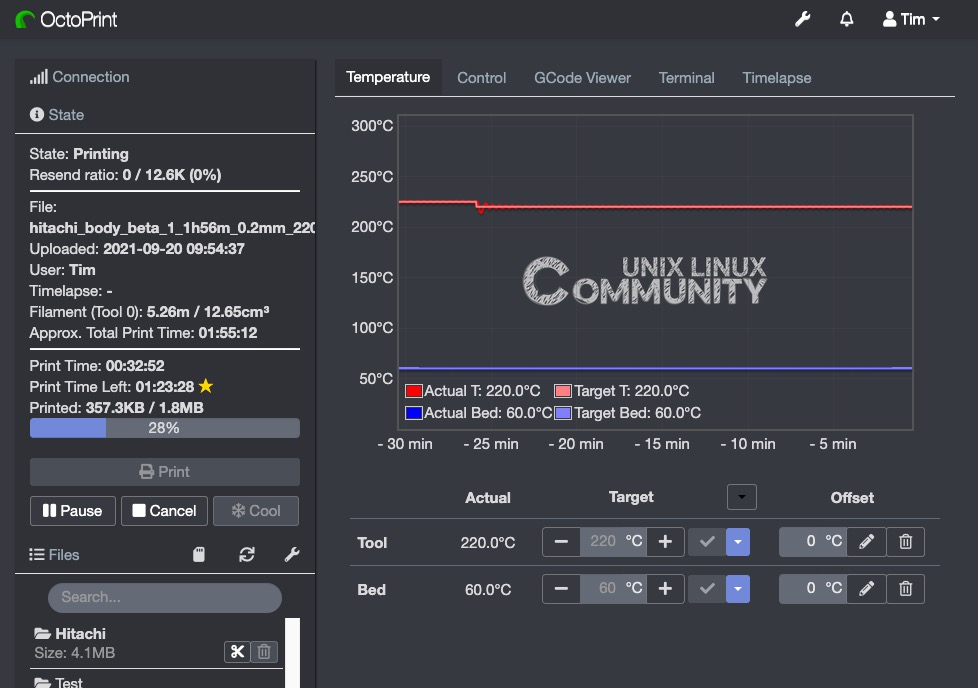
Themeify permits makers to have a dark theme and to also customize the background logo in the OctoPrint temperature graph:

Screen Shot 2021-09-20 at 11.15.08 AM

I printed some Hitachi parts in both Bing3D PLA-F and esun PLA+ with plans to show them all to the head of building maintenance and ask him to choose which material his team likes better. I will not mention which print is from esun or Bing3D and simply let him feel and work with the different prints.

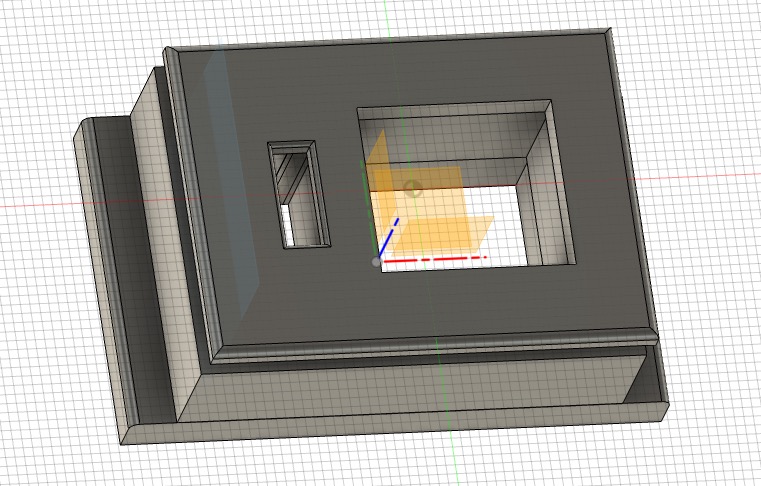
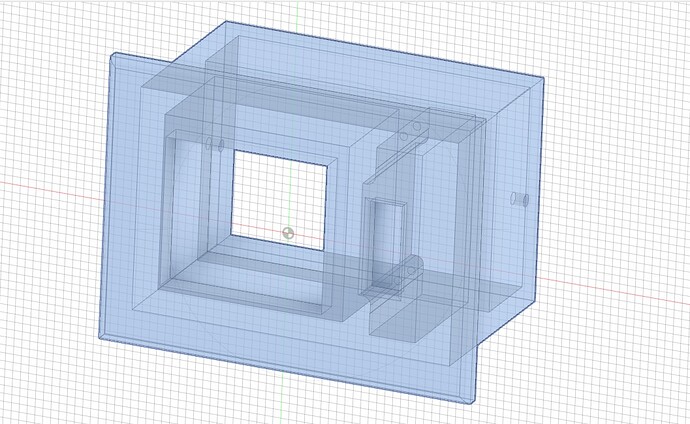
Based on the strength of the esun PLA+ Fire Engine Red (from yesterday's tests), I ordered a spool of Black PLA+ from esun and will test side-by-side with Bing3D once it arrives. I designed these elevator button housings with three components :slight_smile:

  1. the body,
  2. outside sleeve to hold the body in place, and
  3. an inside insert to secure the PCB board to the body).

These parts fix together very exactly (and tightly) and it will be interesting to see how they print and fit together, comparing PLA from two different manufactures.

The lifts in this particular building get a lot of rough treatment from contractors and from vandals, so I'm hoping this design will be strong enough to survive stress from both.

Three weeks ago, I had no idea about CAD design and 3D printing, and now I'm designing, prototyping and testing different materials to replace Hitachi lift button housings. Our living room has turned into a makeshift, tiny additive manufacturing workshop.

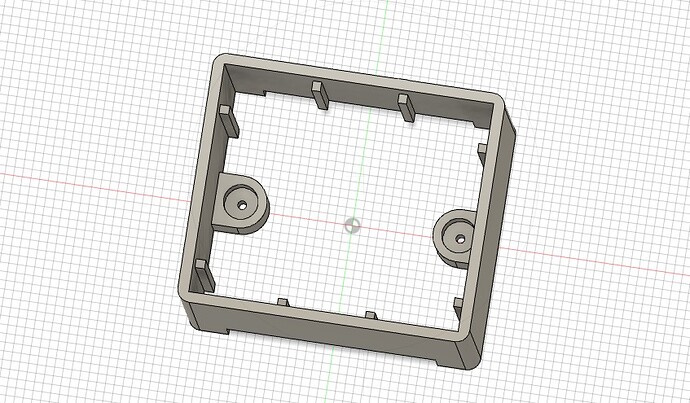
Fusion360: Rugged Elevator Button Housing Body with External Sleeve

Screen Shot 2021-09-20 at 11.36.02 AM

This is all new to me, but so far it's been a lot of fun learning 3D printing and CAD. My current setup is:

  • Design: Fusion360
  • Create g-code from mesh files: PrusaSlicer
  • Print control: OctoPrint
  • Printer: Ender 3v2

It's truly remarkable that all the above is free for DIY makers except for the printer, which cost between $200 and $250 USD. Incredible, when you think about it.

What do you think? Are you a 3D CAD designer? Are you a "download and print it" person? Both?

Please leave your thoughts in reply.

1 Like

Several years ago i bought myself an Prusa MK2 which along the years i upgraded to my current MK3 modified to a Bear chassis MK3.

At first i only downloaded and printed from thingiverse but i did create some custom parts using tinkercad. I did some dipping into fusion 360 but so far that didn't work out yet. Mostly because i kinda lack the time and patience for it.

Seeing how it was several years ago it really took a flight for the best.

Since the beginning i have been using octoprint with the printer and since the last couple of versions i even got as far as using the api to upload the gcode straight to octoprint whenever i use simplify3d to create the gcode.

1 Like

S3D only runs on Windows, as I recall, and to be honest, I never use any Microsoft operating systems.

That's why I use either Cura or PrusaSlicer because they both run multi-platform and especially macOS.

Prusa is quite a bit more investment compared to my started Ender3v2, so you must have really been into printing a lot of models back then.

Simplify3d is windows only indeed. I started with prusaslicer back then but in several Youtube vids Simplify was the new hot thing so i tried it and i switched. During the years i did try prusaslicer and cura again but i just could not find myself switching as i was used to simplify.

When i bought the Prusa it was one of the few ones around there actually and if i remember correctly when i bought it, it even got the maker award for being the best consumer printer available at that time. The ender series was not even around at that time.

Looking back i would still do it the same as the prusa is extremly reliable and great to print with. I hardly had problems with it except for a small alignment issue when i just started which was easily fixed by realigning.

Regarding the printing itself, i actually did not print that much. I think in all the years that i have a printer it only printed like 5 spools in total so its not that much. I always try to keep it to functional prints alone and not fun things.

Last year i even bought a spool of nylon and flexible filament to try although i still have not used them. That is mainly because the nylon has a really high moisture absorption and i do not really have a room to keep it in (yet).

I keep my filament in plastic lock boxes with those silica drying agents packages in side.

However, when I discussed this with Bing3D, they said that it's easy to dry out filament; and they recommended 30 minutes in a microwave at 30 degrees C for PLA. I would guess other filaments can be dried out in a similar manner.

They also told me I could preheat my oven to around 40 degrees C and do the same in the oven; as long as we are careful to keep the temperature stable.

Today, I am designing another Hitachi elevator button housing replacement. These are only a year old; but they are already breaking apart; so I was asked to help design and print a replacement set.

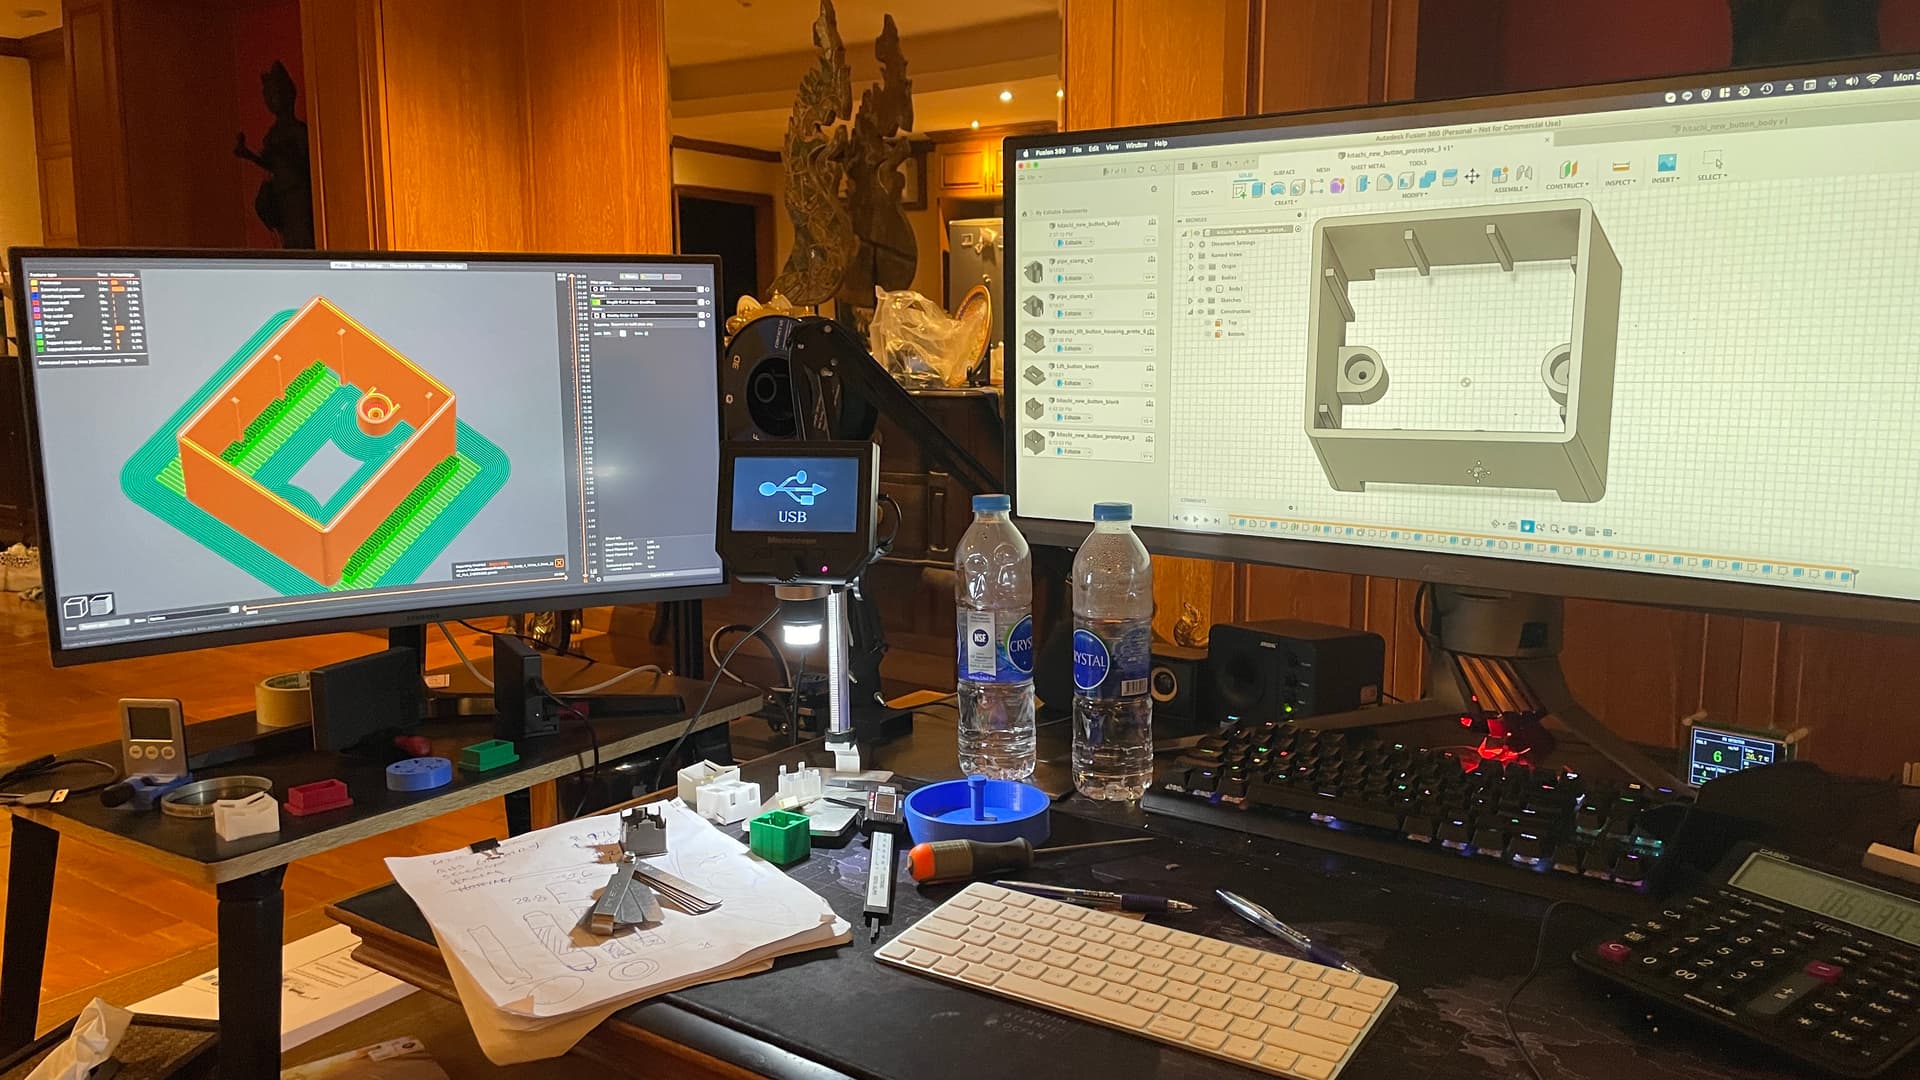
My desk is really getting messy.......

You can see such a mess:

  • PrusaSlicer on the left
  • Fusion360 on the right
  • Ender 3v2 in the background (middle)
  • Digital microscope, calipers, feeler gauges etc in the foreground middle.

Every time I clean up my desk and organize things better, a new project starts.

If you look closely, you can see a little cheap digital timer on the far left under the monitor in a 3D printed mini-vise. That's my "on the clock" tracker when I am billing clients developing software by the hour (not today).

1 Like

It is indeed possible to dry them in a preheated oven but i rather save the spool for when i have to print quite alot. I do have a plastic dry box which is specifically designed to keep the moisture out of the filament but the silica packages are all full.

I thing i did notice during al my years of printing and that is to always use 3 outer layers which in combination with about 20% infill gives quite alot of strenght to a part.

Your setup looks awesome. When i have some time i will see if i can make a picture of my setup.


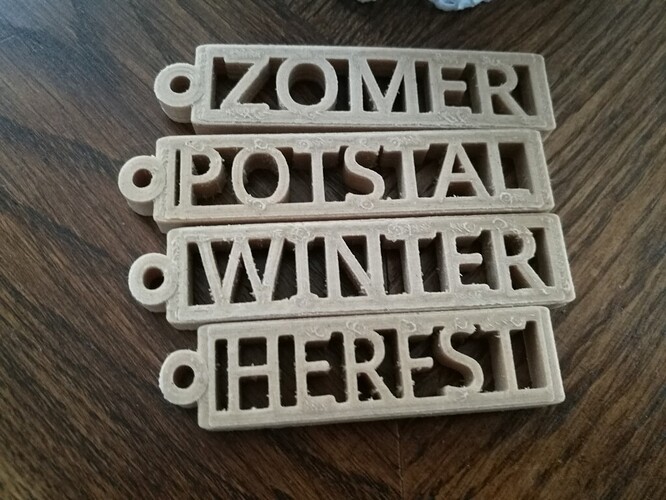
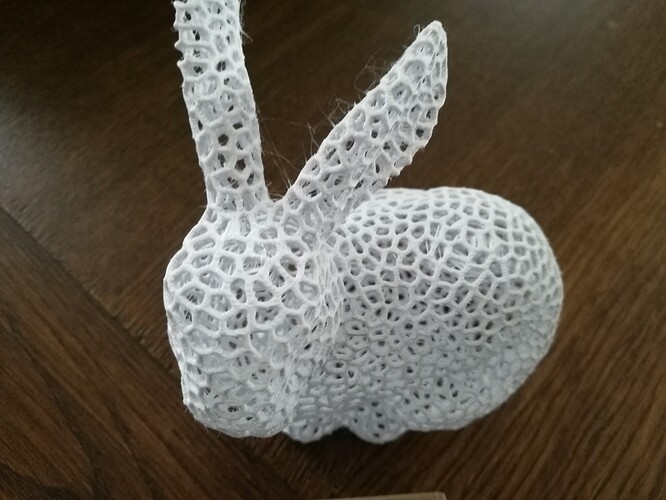
I did find these 2 pictures of some things i printed a couple years ago. The top one are keyhangers and the lower one was actually a test print with PLA to see how far i could push the machine. It has a really small footprint but it stuck quite well. The first one is printed with wood pla btw.

1 Like

That's a good combination, three walls and 20% infill; for some larger parts; but I have found for smaller parts with thin walls, like these elevator button housings I am designing and printing; I need a lot more fill to insure they are strong.

You cannot see it in the photo; but behind the digital microscope there is a folded boom mike and it mounts on a 3D printed base table-vise I made. When I printed it with 20% infill, it started to warp when I applied pressure to the 30mm screw for the vise jaw, so I changed it from PLA to PETG and moved infill up to 50% and it is very strong now.

My limited experience with design is that it is an iterative process; and like you, I am only interested in functional, mechanical models; not statues and sculptures and toys.

For example, sometimes I design and then print and the parts connect together too tightly, so I shave off a few tenths of a millimeter in Fusion360 and reprint. Sometimes just light sanding does the trick as well; because plastic does not print perfectly like machining a part in a mill.

I made one prototype today, and it was perfect and printed it again with parts from another lift button, and it needed sanding to work smoothly. Such is working with plastic and consumer grade printers, I have learned in the past three weeks.

Yeah, that's quite a test case, your lattice rabbit. That's really pushing things!

I'm also interested in wood additive filament; but I'm so busy designing Hitachi elevator button housing replacements (for four lifts and two different style buttons, think the final count will be over 220 button housings because the building is 30+ floors); playing with wood additives to PLA or PETG will have to wait a bit longer.

Honestly, I got bored with printing others peoples models very quickly and much prefer designing my own in Fusion360 and building functional parts. Just about everything I find on Thingiverse, I end up remixing or totally redesigning at some point.

It hard to believe I have not yet hit the "one month mark" in 3D design and printing.

Everything i print is in PETG (at least in the last few years), i do have some PLA and other types lying around but most of the stuff is PETG. It is quite strong and hardly warps although i do print with about 90 degrees print bed.

Regarding the infill it i found a really nice guide https://www.youtube.com/watch?v=upELI0HmzHc which helped me quite alot of getting more strength in parts. CNCKitchen is by far one of the best channels to follow as he does alot of tests with print speeds etc.

One other reason i use 3 layers is because it is easier to sand them down a bit and then getting good fitting parts although i hardly have parts that are more then 1 piece. Designing and printing can be quite a challenge but if you keep on trying you will always find a way.

One of the prints that i made myself was a really simple pen holder for a Silhouette Cameo 3 that i had. It just needed a screw and worked perfectly fine and because i made it myself it was quite cheap to use other colors and all.

But i also made a simple holder for a heatgun that we use at work so it does hang to the side instead of lying on the table and risking a burn or a other functional print are headset holders so we have our headsets mounted on our monitors.

Its cool to see that you got so far in only a month of time. I am not even close to that level of designing.

1 Like

Yeah, I agree. CNC Kitchen is good. I subscribe to that channel. Stefan is really nerdy, I like him.

These days, I focus on Fusion360 YT videos.

Kevin Kennedy is very dry (just the facts) and very detailed oriented and very good. If you want to learn Fusion360, I think he is very good:

If you learn Fusion360, I think you will have even more fun with 3D printing.

I like PETG for finished products which need to be very strong (relative to PLA); but it is too sticky and requires too much heat for prototyping; so I keep PETG in the dry box for a final print and mostly burn though a lot of PLA+ working on refining prototypes.

Honestly I really PETG but I don't like how sticky it is and how much heat it needs; so I only use PETG "when really necessary", but hey, I'm just a novice!

Also, PLA is biodegradable, so for all the prototyping I do, I create a lot of plastic waste and so I want all that waste to be biodegradable plastic. PETG is not biodegradable.

Maybe someday I will take all my waste plastic and do like CNC Kitchen and make my own filament from waste .... not sure yet if I will go that far yet.

I do know product design online as i have it bookmarked but i guess i am just too lazy to start with it :sweat_smile:

At the moment i hardly print so i do not really need to switch to fusion although i still want to learn it.

Did you ever try to use a gluestick for printing petg? It makes it getting off the print surface alot easier. For me petg always printed alot easier then pla for some reason but that might be because the machine is mostly dailed in for petg and i did not create a profile for pla yet.

Both can be recycled using different methods but i do agree that it will be quite a hassle to get it to work properly. I believe thomas sandeler (not 100% sure if the name is correct) and the 3d printing nerd both tested a device for creating new filament from your old filament to reduce the waste but it looked quite annoying to dail in properly.

For now i am mostly concentrating on learning python and when someone needs something printed i throw it on there but nothing else. Maybe soon i will print some tool holders that i can use but thats about it.

1 Like

No. I don't have a problem getting things to stick to the print bed and to come off the bed (knock on wood... I have now jinxed myself for sure!).

I currently use the OOTB Creality carborumdum glass bed that comes with the newish Ender 3v2 and it works great as long as I:

  1. insure the print bed is level (manually leveling, I already upgraded the springs to stronger and thicker springs); and,
  2. use a brim in most cases for small parts or when the center of gravity is not close to the bed.

Yes, both can be recycled, but PLA is biodegradable which is very important to me as a tech and recreational scuba diver. I see a lot of plastic waste in the ocean and it "really pisses me off". I also live only a around 150 meters from the ocean and I also see people just toss trash on the beach, plastic waste, and it really bothers me a lot.

I actually looked at the Python code for a few OctoPrint plugins on GitHub today. I am pretty sure I will find a reason to write my first Python OctoPrint plugin , or fork and modify an existing plugin, sometime this year,

One good way to learn Python is to take another persons code from GitHub and modify it. I have found over the years that this is a very fast track to learning new things:

  • Start with a use case like OctoPrint for example (something you are using and are interested in).
  • Take a plugin which is good, but needs more features; and then
  • Fork the repo and modify the plugin and add the new feature.

This is a great way to learn to code in a new language and it works well for me. I started this way with Ruby and I just completed the initial release of a huge Ruby on Rails project where I did 100% of all the coding and I'm happy to say the app runs great.

So, I'm pretty sure because I am starting to like OctoPrint I will code in Python and start modifying or writing plugins sooner than later. It all depends on my mindset later this year after getting all these 3D design projects that fell into my lap this month off my desk.

Now i see why you have so much problems with PETG. It sticks like crazy on glass and i believe it is recommended even to use a glue stick in between. Although i did see a video a couple days ago about G10 surface which is supposed to be crazy good. I might be looking into that as its quite cheap and should work great according to makers muse.

It is annoying as hell if ppl cant clean up after them selfs. Considering i only print functional prints i hope i keep the waste down as much as possible.

I dont use that many plugins for Octoprint. Mostly i have Prusa bedleveler (not 100% sure whats it called) and some gui changes but nothing weird or fantastic helpfull. Since i live quite small i do not need any particular plugins for camera's and all even though i do have a camera pointed at the printer. Since i am quite a novice regarding python i am not planning on making own plugins anytime soon. Cool to see though that you are already thinking of doing that even though you only started a couple weeks ago.

May i ask why you started with these fdm printers? Did you for example check resin printers also or was it pure fdm alone?

I am looking closely at resin printers myself but not sure if i should get one anytime soon. There is already too much stuff on my list to have or get that i hardly have time for new stuff. Also i am afraid that it will just sit there in a corner for a while.

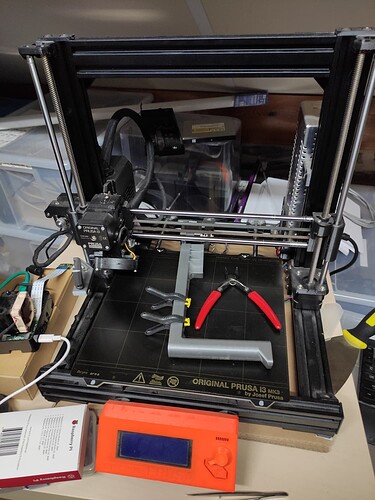
Below is a picture of my printer. Normally when i print i pull it next to the bureau so its about in the middle of the room. Also you can see the drybox in the background ( i do remember that food dryers where supposed to be really good for drying also) and in the front you can see the case for the raspberry (the one running octoprint) which is printed in petg black, the camera holder and spool holder which are printed in pla (prusa) grey.

Also you can see that i have a big carton box under the printer to dampen the sound it makes during printing. Because its quite speedy it can get quite noisy in my small apartment. That cm thing carton box helps quite alot with dampening the sound.

I do. not have problems with PETG. It's simply sticky (that is a basic property of PETG) and PLA is better for prototyping and PLA is biodegradable and so I prototype with PETG. Stickiness is an inherent property of PETG because PETG is more sticky than PLA; and so that has nothing to do with me or my software or setup.

When I say "PETG is sticky" I am not talking about bed adhesion or layer adhesion, I am talking about hot PETG, it is sticky. It tends to clog. Stickiness is an inherent property of PETG. This property of PETG is well known.

Here is a reference from the net, one of thousands on the "stickiness" of PETG:

Screen Shot 2021-09-21 at 1.07.01 AM

Not sure where you got the "you have so much problems with PETG" from? As I said, I have no problems with bed adhesion with any filament I currently use, PLA or PETG. I simply do not like PETG for the reasons aforementioned and prefer to prototype in PLA (again) because PLA is biodegradable and when we prototype mechanical designs which interconnect with other components, we generate waste prototyping . PETG is not biodegradable. I think you might not understand (or maybe you do not study these properties) since you are not really into CAD design (you said you prefer to print downloaded files) and you do not do a lot of prototyping.

When we prototype designs, we print the same part (repeatedly) to refine the model. Plastic is not metal and these additive consumer grade FDM printers do not have the accuracy of a CNC mill or lathe in a machine shop. I know because I actually worked in a machine shop for a few years when I was a teenager. I worked with very hard steel in Costa Mesa, California mostly on turret lathes (as a machinist, not a designer back then). Prototyping is a key part of the CAD design lifecycle and the roots of 3D printing are doing just that, doing design prototypes in plastic before sending the final version off to be manufactures in some metal alloy.

I do not like resin because I don't want to deal with the mess of liquid resin, wearing gloves, dealing with resin spills, dealing with models falling off the print bed into a resin tank, etc. Going with FDM was a lifestyle choice. I don't like resin and do not want it in my beach side home and do not want my wife to have to deal with the mess and the smell. We like sunshine and resin cures in UV light; so there is nothing about resin printing that appeals to my lifestyle oceanside.

My Ender3 is pretty quiet and anyway, as you know by now, I live next to the ocean and have front (ocean) side and rear balconies and so we get a lot of ocean breeze and the sound of the ocean surf is much louder than the sound of a fan motor on my printer.

I guess we have very different lifestyles and so of course the choice of how we configure our 3D printers and how we prioritize various aspects of 3D printing will be different. Also, I tend toward CAD design and do not really enjoy pulling down files from the net and printing others designs. I like solving problems like "we have 200 broken elevator buttons from a 40 year old elevator and we cannot order them anymore...." , designing new and replacement parts which are functional and generally mechanical.

I am the same way with software; and tend to develop a lot of software for functional applications which solve specific issues like cybersecurity or production. My first UNIX job was on the Motorola radio assembly line in the Chicago area where I wrote HP-UX system level software to read all the data from every piece of HP test equipment and send the results to an SQL DB for post-production analysis. After than I worked on UNIX systems for Inmarsat M/B and wrote satcom tracking software and worked on code in digital signal processors for satellites to increase the SNR (signal-to-noise ratio) etc. This was all back in the late 1980s and early 1990s.

I am a systems engineer by profession, so I get bored quickly and after I understand something "good enough", I tend to move on to a new thing to learn. Right now, I have developed some fascination with CAD (Fusion360) and printing my designs, solving functional and mechanical problems, with my three week old first 3D printer (which I am very happy with).

Well, this is getting very boring, I am sure. It's 1:30 AM and I'm up only because I have been working on some difficult (for me) CAD issue with Fusion360. Time for sleep.

Nice chatting with you!

Sorry i did not mean to offend you. My apoligies if i did misunderstand you. I do understand you now that meant the stickiness with the printing itself. It can be hard to work with that indeed. PLA is quite alot easier in that regard and you are right that for prototyping PLA is quite alot easier to work with since it can be printed without a heated bed if you are a bit lucky although i always printed with a heated bed.

I do indeed do not quite understand the chemical properties much of the printing filaments ( it is hard to write it down also and since English is not my main language i might misinterpret or say the wrong things). What i do know is that alot of companies are using or starting to use fdm printing for prototyping because its quite easy/fast to do and also quite inexpensive to do rapid prototyping.

I was just wondering about the resin printing so its nice to see that you actually find the environment more important besides being the mess that resin is with all the cleaning etc. It was mostly out of interest to see what makes ppl move to the one or the other options that are available.

A friend of mine has a ender 3 and it is indeed quite quiet, i believe it makes about the same levels of sound like the prusa. Since i live in quite open space you can hear it though and since i am sitting almost next to it (only a meter or so away) it can get loud when i am trying to watch tv.

Solving a problem is something i do also although not in that capacity. For me its mostly my boss who wants some shiny new data graphic which i then have to create. I always try to fix this by creating something he then can use and hopefully it does not break down. For some reason that does not always seem to happen as he always seems to find a way to break it :joy:.

Someday i might hop on discord and maybe we can talk some more. I am quite fascinated by the way you are approaching the problem and then find a solution for it.

For now have a nice sleep and hopefully we can talk more on this or that in another time. Again if i offended you in any way i am sorry about that. That is and will never be my intention.

Hi @SDohmen

Do not worry! I am not offended at all. My goal is to keep the technical facts straight in a public makers forum.

in closing, here are my reasons why I do not prototype in PETG.

  • Prototyping generates plastic waste.
  • PLA is biodegradable.
  • PETG is not biodegradable.
  • PETG requires hotter printing temperatures.
  • PETG is “sticky” or “gooey” when hot.
  • The extra strength of PETG is not required for printing intermediate prototypes during dimensional analysis.

I hope it is clear why I prototype functional parts in PLA and not PETG..

If you have any more questions please feel free to ask!

Or, perhaps better @SDohmen please help us build our makers topic by creating tutorials or project topics in our makers forum based on your hands on DIY projects.

One thing I have noticed over the past few weeks is there is a lot of misinformation on the net about 3D printing. A lot of people are working to make a profit by creating content and discussing aspects of 3D printing who appear to be “information brokers” versus actual doers and makers.

There is a big difference between “talking the walk” versus “walking the talk” and my goal is to provide only the hands on facts and analysis to assist beginners get started in DIY additive manufacturing.

Also, FYI.

A filament manufacturer in China messaged me and asked me to post my analysis of their new filament materials. So keep an eye on this forum because I expect to receive some new “state of the art” FDM filament later this month directly from the research factory in Shenzhen, China.

Cheers!

1 Like

I of course have more questions as my curiosity has no limits :sweat_smile:

  1. What happens when you have created a part which is complete and working? Do you use injection molding to get a finished product or like you mentioned before use metal printing.
  2. Even though you only have the printer for several weeks are you looking to upgrade this particular unit? For example with a bltouch or another type of buildplate like buildtac to make it easier to remove objects ( i believe the ender has a hard surface which is not bendable?) or are you keeping this unit as stock?

Regarding helping to build the makers forum, sure i am always willing to help but i am not 100% sure how to help with that. I do have some exp with 3d printing and designing very simple objects in tinkercad and also some exp with cnc machines how to design and work with that but again its only simple objects and all.

Do let me know what you are looking for and i will see how i can contribute.

This depends on the functionality and material requirements. The current Hitachi elevator button housings I am prototyping (nearly finished), the building engineers plan to test the final prototype with users (maybe one or two buttons at first) in PLA-F first and if we are happy with the strength, I will print more in PLA-F. If not, then I will change to PETG+. However, before we "mass print" any prototype, we will unit-test first over a few weeks with the building engineers.

After we finish testing live with actual users, we will decide the next steps; but my guess is the building supervisor will ask me to print more in PLA-F, since they already like the prototypes and they are very strong as designed (to survive user abuse and vandalism).

The table-vise mount for my microphone boom was prototyped in PLA+ and I did the final print in PETG, and it is very strong and I have no plans to print it again anytime soon. PLA+ was great for prototyping, but it was too weak to handle the stress of a 30mm vise screw, even at a very high percentage of Cubic infill. PETG is much stronger compared to PLA. For these parts, I don't need metal or carbon-fiber. Maybe in the future if a requirement comes up and I design some parts for my motorcycle or cars; then I will decide what to do. I may just send the design to a machine shop and let them mill my CAD design in aluminum after prototyping in PLA.

In other words, there is no general answer to your question about materials because these parts are not for mass production. My current projects are for one building and the people driving the final product are the building engineers. They will tell me what the like and how good the designs and materials work. The want to save money, so I am guessing they will be happy with PLA.

I have BLTouch already (in a box in my closet) but I am not going to install it anytime soon. I prefer manual leveling. When we manual level, we can get a feel for what is going on and so my recommendation is for all beginners to "buck the YT trend" and get passionate about manual bed leveling and CAD before considering adding trendy types of machine -leveling upgrades. You have probably noticed that a large majority of YT video are about "how to upgrade your printer" but I thing CAD design and prototyping are a much better use of time.

Regarding the build plate, as mentioned before, I don't have an issue with removing models from the print bed. so I'm not going to solve a problem that I don't have. I have plenty to do with my setup without resorting to doing printer upgrades to stay busy. I did order some "flexible build plate" a few weeks ago, but I cancelled the order and decided to stick with the great OOTB build plate which comes with the Ender 3v2. Frankly, I'm not much at following YT trends and upgrading perfectly working printers.

Frankly, I have looked many upgrades and the only upgrade I'm happy with so far is changing the print bed springs and leveling wheels. The Ender 3v2 works great OOTB and after watching many YT videos on "the best upgrades for your 3D printer" etc. I got bored quickly because most of the upgrades seemed not as useful as learning Fusion360. I have printed over 3KG so far and have had little problems with printing, except for the one day of down time a few days ago, which seemed to be based on clog which happened after I printed a big model with PETG. But to be frank, I don't have enough evidence to say with 100% accuracy what was the problem and it cleared itself after I ran a bunch of PLA though the extruder with failed prints; and then the problem cleared up "all by itself".

Also, there is a lot of buzz about adding the Raspberry PI to the printer, but I have my printer directly connected to my mac via USB cable, and it works fine. So this is another area where all the YT hype about adding a PI to the printer is not useful for me; as I have 64 GB mac with 12 cores attached to my printer :slight_smile:

Thanks.

Well, IIWY, I would consider forking a Python plugin for OctoPrint and adding a new feature; and document all your steps, both success and failures - the chronicles of @SDohmen. You are interested in learning Python and OctoPrint is written in Python and writing plugins are a great way to learn a programming language. However, before you write your own plugin from scratch, I think it is best to fork and modify an existing plugin because most every plugin could use some feature enhancements. I noticed that many OctoPrint plugins I installed need new features and enhancements.

This is how I leaned Ruby, BTW. First, I modified some Discourse plugins. Then I wrote some Discourse plugins from scratch. Then I built an entire back-office application for a business who wanted to completely transform how their legacy app worked. The ROR project was huge and of course, when we come out of a project like that, our skills are quite strong in that language and style.

This is why I always recommend people learn coding by doing projects.

This is also why I recommend you @SDohmen fork a OctoPrint plugin and add new features to it. You will help out the community and you can document your progress step-by-step; and you will learn Python.

As a side note, I'm not knocking our forums, especially since I founded these forums decades ago; but personally, you might notice that I never ask coding questions on the net (in any form or forum). I think it is easy to read code, read the docs and write code without asking others to tell me what I can easily do myself from reading the docs and writing my own code (making mistakes and trying again until it works). There is so much code on the net, I find it's easier and much faster to just read code, write code, test code and repeat.

So, IIWY, since you want to learn Python, I would first fork a Python OctoPrint plugin you are interested in and add some new features. You will learn Python and you will gain experience with OctoPrint plugins and you can teach us all how you travelled from "zero to hero" with your first plugin remix.

Cheers.

Note: If there was any change I could make today to the Ender 3v2 it would be to replace the micro USB port with a much more robust USB-A port. The Ender 3v2 micro USB port is very flimsy and easily disconnects and causes connection problems. I should also set up my Logitech web cam to remotely monitor the prints using OctoPrint.