NodeMCU ESP8266 Blynk SSL Application for Linux Server Load Averages

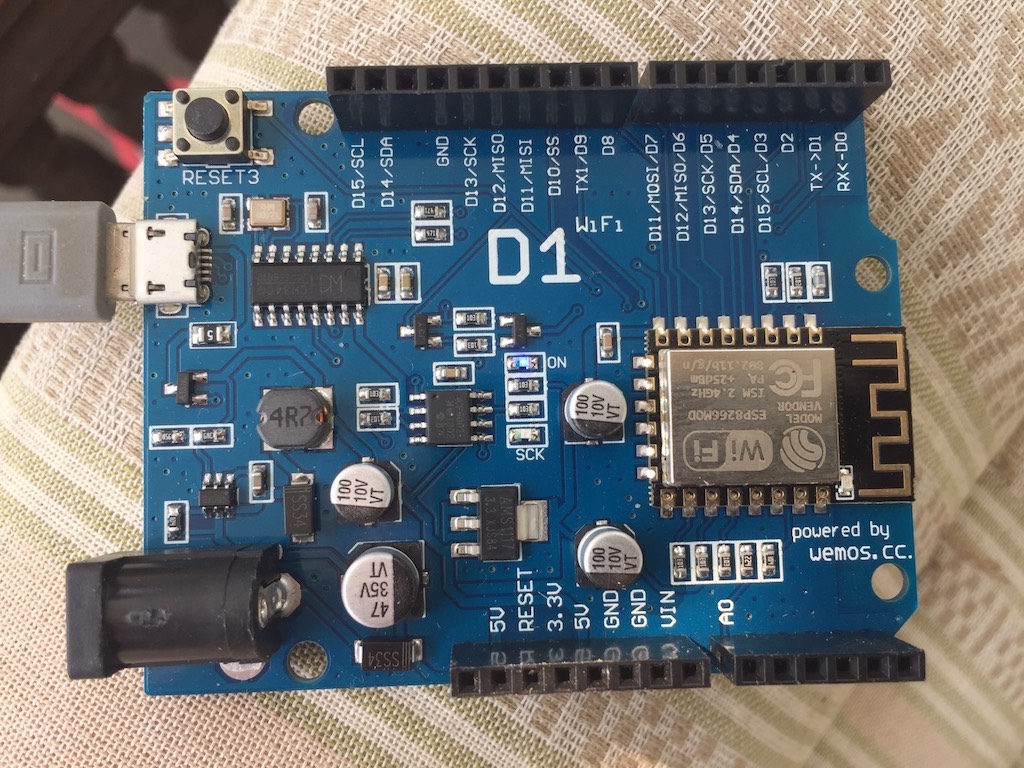
Here is a useful SSL (HTTPS) application for anyone with a remote Linux server they want to keep an eye on using Blynk and the NodeMCU ESP8266. This little app also works (have tested as well) on the WeMos D1 ESP8266 Arduino board.

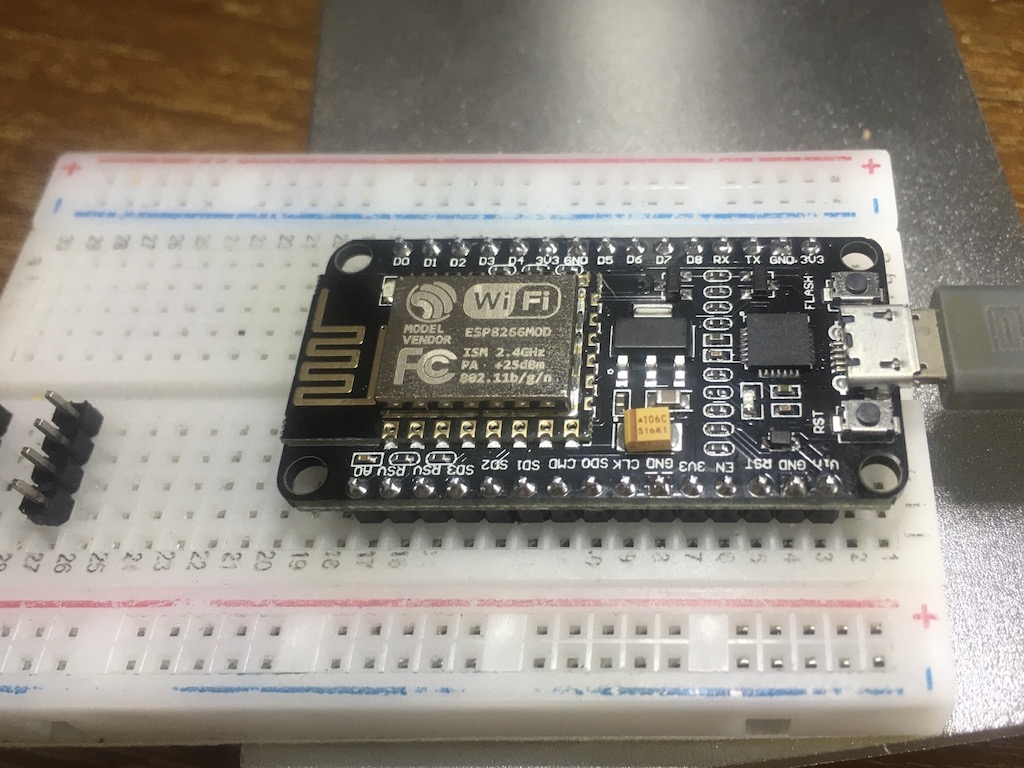
The NodeMCU setup could not be easier, just find a suitable mini-USB cable and plug it in

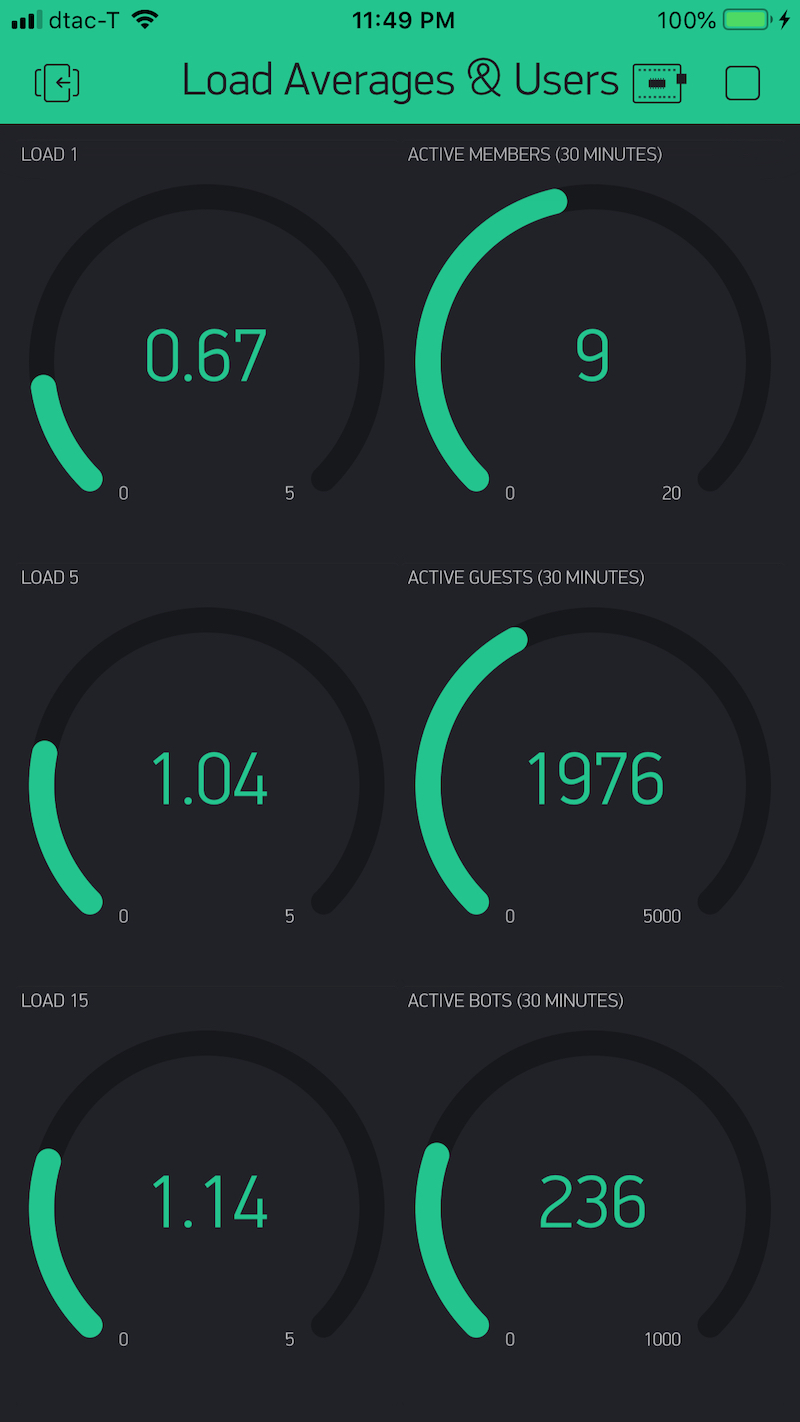
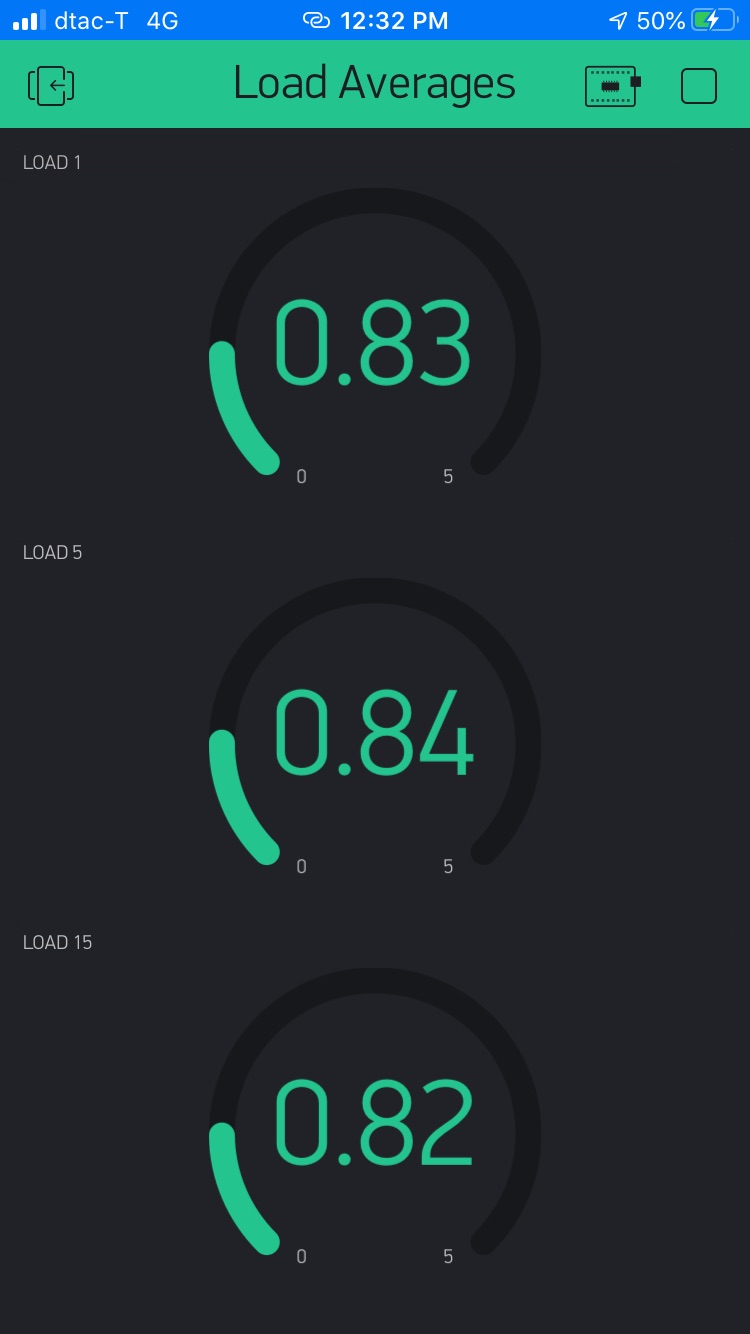
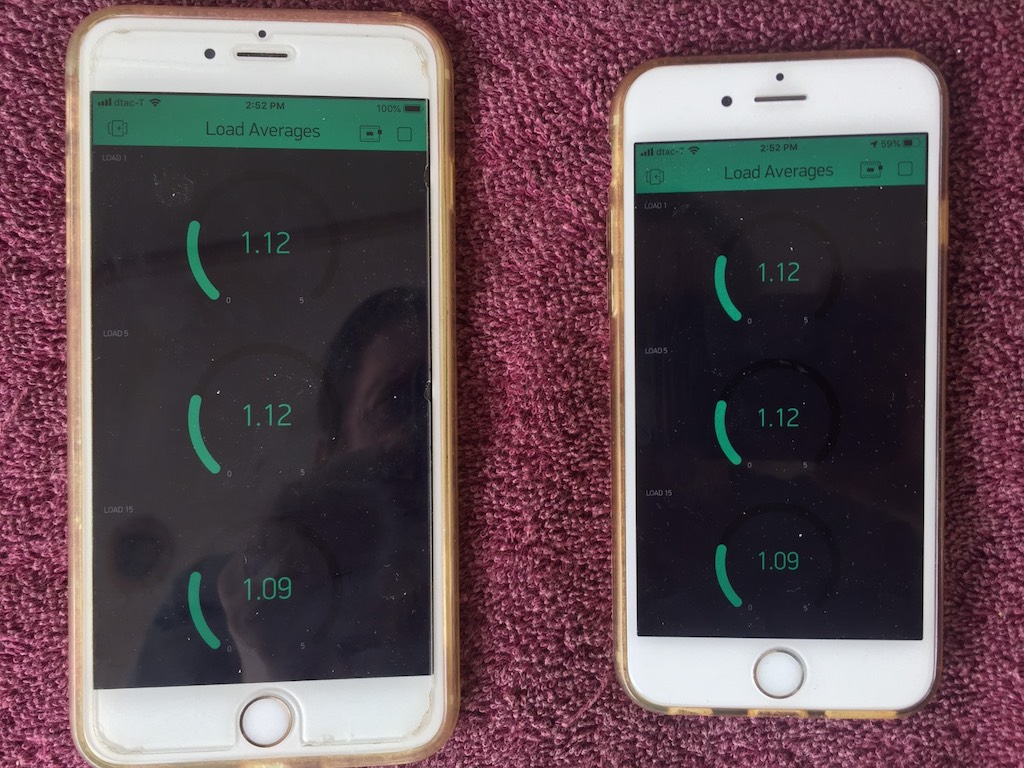
The Blynk app (running on aniPhone) looks like this:

Here is the Arduino sketch, which requires the ESP8288 board manager lib:

https://arduino.esp8266.com/stable/package_esp8266com_index.json

and you also need to install the Blink and the ESP8266 libs in your Arduino IDE (I assume you can do these tasks, if not please reply and ask).

Here is the Arduino sketch. You will need the SSID of your WIFI network and the password (if any) and your Blink app auth code:

/*************************************************************
  This Arduino sketch is for the NodeMCU ESP8266  v0.11
  The code makes an GET request to a remote Linux server PHP API using SSL
  and GETs the Linux load averages as a simple string, parses the
  string in a very basic way display the results on a Blynk apply
  using virtual pins v0, v1 and V2.

  The entire sketch should be rewritten to use JSON.

  Use anyway you wish, freely and at your own risk of course.

  Neo https://www.unix.com  January 31, 2020
  v0.11  removed  delay(2000); //GET Data at every 2 seconds per PeteKnight
    https://community.blynk.cc/t/blynk-project-nodemcu-esp8266-ssl-application-for-linux-server-load-averages/43305

  Download latest Blynk library here:
    https://github.com/blynkkk/blynk-library/releases/latest

  Blynk is a platform with iOS and Android apps to control
  Arduino, Raspberry Pi and the likes over the Internet.
  You can easily build graphic interfaces for all your
  projects by simply dragging and dropping widgets.

    Downloads, docs, tutorials: http://www.blynk.cc
    Sketch generator:           http://examples.blynk.cc
    Blynk community:            http://community.blynk.cc
    Follow us:                  http://www.fb.com/blynkapp
                                http://twitter.com/blynk_app

  Blynk library is licensed under MIT license
  This example code is in public domain.

 *************************************************************
  This example runs directly on NodeMCU.

  Note: This requires ESP8266 support package:
    https://github.com/esp8266/Arduino

  Please be sure to select the right NodeMCU module
  in the Tools -> Board menu!


  Change WiFi ssid, pass, and Blynk auth token to run :)
  Feel free to apply it to any other example. It's simple!
 *************************************************************/

/* Comment this out to disable prints and save space */
#define BLYNK_PRINT Serial

#include <SPI.h>
#include <ESP8266WiFi.h>
#include <BlynkSimpleEsp8266.h>
#include <WiFiClientSecure.h>
#include <ESP8266HTTPClient.h>
#include <ArduinoJson.h>
BlynkTimer timer;
// You should get Auth Token in the Blynk App.
// Go to the Project Settings (nut icon).
char auth[] = "YOUR_BLYNK_AUTH_CODE";

// Your WiFi credentials.
// Set password to "" for open networks.
char ssid[] = "YOUR_WIFI_SSID";
char pass[] = "YOUR_PASSWORD";

const char *host = "YOUR HOST";
const int httpsPort = 443; //HTTPS= 443 and HTTP = 80

//SHA1 fingerprint of certificate. Use your web browser to view the SHA1 fingerprint and copy
//Reply in this discussion if you don't know how to get the SHA1 fingerprint of your HTTPS website, thanks.
const char fingerprint[] PROGMEM = "AA BB  34 7B C0 FE CF 3C A8 2B 6D 31 6B 4B 9F C3 5B 6E A0 EE";  

void setup()
{
    // Debug serial console
    Serial.begin(9600);

    Blynk.begin(auth, ssid, pass);
    timer.setInterval(1000L, myTimerEvent);
}

void loop()
{
    Blynk.run();
    timer.run();
}

void myTimerEvent()
{
    WiFiClientSecure httpsClient; //Declare object of class WiFiClient

    Serial.println(host);

    Serial.printf("Using fingerprint '%s'\n", fingerprint);
    httpsClient.setFingerprint(fingerprint);
    httpsClient.setTimeout(15000); // 15 Seconds
    delay(1000);

    Serial.print("HTTPS Connecting");
    int r = 0; //retry counter
    while ((!httpsClient.connect(host, httpsPort)) && (r < 30))
    {
        delay(100);
        Serial.print(".");
        r++;
    }
    if (r == 30)
    {
        Serial.println("Connection failed");
    }
    else
    {
        Serial.println("Connected to web");
    }

    String Link;

    Link = "/httpTest/?type=t";  // Here, the API for the Linux load averages are in the httpTest directory
    Serial.print("requesting URL: ");
    Serial.println(host + Link);

    httpsClient.print(String("GET ") + Link + " HTTP/1.1\r\n" +
                      "Host: " + host + "\r\n" +
                      "Connection: close\r\n\r\n");

    Serial.println("request sent");

    while (httpsClient.connected())
    {
        String line = httpsClient.readStringUntil('\n');
        if (line == "\r")
        {
            Serial.println("headers received");
            break;
        }
    }

    Serial.println("reply was:");
    Serial.println("==========");
    String line;
    while (httpsClient.available())
    {
        line = httpsClient.readStringUntil('\n'); //Read Line by Line
        Serial.println(line);                     //Print response
    }
    Serial.println("==========");
    Serial.println("closing connection");

    // crude way to parse string - should convert to json later
    int ind1 = line.indexOf(':');                    //finds location of first :
    String l1 = line.substring(0, ind1);             //captures first data String
    int ind2 = line.indexOf(':', ind1 + 1);          //finds location of second :
    String l5 = line.substring(ind1 + 1, ind2 + 1);  //captures second data String
    int ind3 = line.indexOf(':', ind2 + 1);          //finds location of third :
    String l15 = line.substring(ind2 + 1, ind3 + 1); //captures second data String

    l1.replace(":", "");
    l5.replace(":", "");
    l15.replace(":", "");
    Blynk.virtualWrite(V0, l1.toFloat());
    Blynk.virtualWrite(V1, l5.toFloat());
    Blynk.virtualWrite(V2, l15.toFloat());
   
}

Here is the very simple service side PHP code.

This PHP code defaults to JSON, but the Arduino sketch above uses a crude "string" method, so the type is set to "t" in the code.

I suggest you add some filtering on the $_REQUEST and maybe some basic security (authorization key) if you go beyond the testing phase. Set the logging to match your preferred logging path.

This API is so simple, I don't think anyone really needs it.... but I include it for completeness:

<?php
http_response_code(200);
$type = $_REQUEST['type'];
$load = shell_exec('cat /proc/loadavg');
$pieces = explode(" ", $load);
if ($type == 't') {
    $output = $pieces[0] . ":" . $pieces[1] . ":" . $pieces[2] . ":";
} else {
    $output = '{"load1":"' . $pieces[0] . '","load5","' . $pieces[1] . '","load15","' . $pieces[2] . '"}';
}
error_log("Time: " . time() . " IP: " . $_SERVER['REMOTE_ADDR'] . " " . $output . "\n\n", 3, '/path/to/your/debuglog/esp8266_debug.log');
echo $output;

Basically, you will need to set up three Blynk gauges based on your visual and font size preferences, etc. There are many Blynk tutorials on the net, so I'll not repeat all those basic steps here unless anyone asks :slight_smile:

If anyone would like to rewrite the API reply parser or modify to add the ArduinoJSON parser, please do so and post your code back.

Thanks.

2 Likes

Hi Neo...

25dBm for WIFI? That's around 300mW from the PA, (Power Amplifier).
I thought the limit inside the ISM band(s) was 20dBm, 100mW for low powered gear.
However...
That antenna IS loaded, so that is probably why the power increase so as to keep the ERP, (Effective Radiated Power), to 100mW...

Great stuff...

Bazza...

1 Like

Thanks. I've modified my service side to to check the RSSI for two modules, one runs on the balcony (with a wall between the ESP8266 and the WIFI router, and the other in the same room:

Time: 1580456123 IP: 159.192.XXX.46 0.78:0.91:1.04: RSSI: -58 

Time: 1580456125 IP: 159.192.XXX.46 0.78:0.91:1.04: RSSI: -36 

Hope this helps.

PS: Added MAC address to the service side logic as well, because I started testing with both a NodeMCU and a WeMOS D1 (both have ESP8266).

Update:

Time: 1580456367 IP: 159.192.XXX.46 1.26:1.18:1.13: RSSI: -52 MAC: CC:50:E3:70:5E:60

Time: 1580456370 IP: 159.192.XXX.46 1.15:1.16:1.12: RSSI: -41 MAC: A4:CF:12:DA:8F:1A

Time: 1580456377 IP: 159.192.XXX.46 1.22:1.17:1.12: RSSI: -50 MAC: CC:50:E3:70:5E:60

Time: 1580456382 IP: 159.192.XXX.46 1.20:1.17:1.12: RSSI: -40 MAC: A4:CF:12:DA:8F:1A

Time: 1580456387 IP: 159.192.XXX.46 1.19:1.16:1.12: RSSI: -53 MAC: CC:50:E3:70:5E:60

Time: 1580456395 IP: 159.192.XXX.46 1.31:1.19:1.13: RSSI: -39 MAC: A4:CF:12:DA:8F:1A

This Blynk app is really cool. I have two ESP8266 devices running and two iPhones with the same Blynk account, and it's working flawlessly. Very impressive.

WeMos D1 with ESP8266 Running the same Load Avg sketch:

Two iPhones running the same Blynk app:

This is awesome really. I think I will use some of the sonar modules I have to create a home surveillance Blynk app when I am bored. This app of course will let me know when anyone is moving around in my home when I'm not there :slight_smile: LOL . Normally I am not really into home automation and surveillance apps (been there and done that a decade, maybe two, ago), but this ESP8266 is really amazing combined with the Arduino IDE for programming. They are so cheap, the sky is the limit!

A downside of this, of course, is the fact all of this kind of this very cheap, robust "IoT" tech can be used in the "new surveillance society" that civilization is marching toward.

The net is pregnant with "ESP8266 WIFI cams" and so many "surveillance-oriented" applications (and also "relay control" applications). I'm trying to think of a few ESP8266 apps that are a bit different (like this Linux server monitoring app) than what's well covered already in blogs and on YTubie.

Way cool...

Looking at your RSSI values they are all inside the """blockbusting""", (strong), area.
I am used to working below -120dBm on BWs less the 3KHz wide, often down -130dBm on SSB for SSTV for receiving, and, transmitting at power levels of +50 to 60dBm, 100W to 1KW...

Great work and you are getting it all working remarkably quickly. Kudos...

When I had my Arduino about 12+ years ago or so there were none of these add-ons so we had to design and build our own which, without serious test gear was beyond the average user. A Spec-An like our HP one cost us around 25,000 UKP in the mid 90s which would be needed to create a """clean""" 2.4 GHz signal at 300mW...

<thumbs up> <terrific> smileys here...

1 Like

I agree.

Everything about tech is faster / easier / more fun compared to even a decade ago.

High quality test equipment is a fraction of the cost. Specialized integrated circuits are abundant and very inexpensive. The culture of "sharing, sharing, sharing" on the Internet via forums, blogs, code repos and videos (YT) binds it all together.

We truly live in remarkable times. I imagine in a few under years people will be able to order an entire quantum gravity amplifier chip, or the latest warp drive module, on AliExpress for $2. LOL

Back to 2020, I will order various ESP32 modules as soon as the Chinese sellers start shipping again.

1 Like

Update; Version 0.2

Changes: Added 30 minute session activity for members, guests and bots. Reorganized gauges. Changed name to "Load Averages & Users"

/*************************************************************
  This Arduino sketch is for the NodeMCU ESP8266  v0.2
  The code makes a GET request to a remote Linux server PHP API using SSL
  and GETs the Linux load averages and basic user stats as a simple string, parses the
  string in a very basic way display the results on a Blynk apply
  using virtual pins v0, v1, v2, v3, v4, and v5.

  The entire sketch should be rewritten to use JSON.

  Use anyway you wish, freely and at your own risk of course.

  Neo https://www.unix.com  January 31, 2020
  v0.11  removed  delay(2000); //GET Data at every 2 seconds per PeteKnight
    https://community.blynk.cc/t/blynk-project-nodemcu-esp8266-ssl-application-for-linux-server-load-averages/43305

  Download latest Blynk library here:
    https://github.com/blynkkk/blynk-library/releases/latest

  Blynk is a platform with iOS and Android apps to control
  Arduino, Raspberry Pi and the likes over the Internet.
  You can easily build graphic interfaces for all your
  projects by simply dragging and dropping widgets.

    Downloads, docs, tutorials: http://www.blynk.cc
    Sketch generator:           http://examples.blynk.cc
    Blynk community:            http://community.blynk.cc
    Follow us:                  http://www.fb.com/blynkapp
                                http://twitter.com/blynk_app

  Blynk library is licensed under MIT license
  This example code is in public domain.

 *************************************************************
  This example runs directly on NodeMCU.

  Note: This requires ESP8266 support package:
    https://github.com/esp8266/Arduino

  Please be sure to select the right NodeMCU module
  in the Tools -> Board menu!


  Change WiFi ssid, pass, and Blynk auth token to run :)
  Feel free to apply it to any other example. It's simple!
 *************************************************************/

/* Comment this out to disable prints and save space */
#define BLYNK_PRINT Serial
#define DEBUG false
#include <SPI.h>
#include <ESP8266WiFi.h>
#include <BlynkSimpleEsp8266.h>
#include <WiFiClientSecure.h>
#include <ESP8266HTTPClient.h>
//#include <ArduinoJson.h> . // unused for now
BlynkTimer timer;
// You should get Auth Token in the Blynk App.
// Go to the Project Settings (nut icon).
char auth[] = "YOUR_BLYNK_AUTH_KEY";

// Your WiFi credentials.
// Set password to "" for open networks.
char ssid[] = "YOUR_WIFI_SSID";
char pass[] = "YOUR_SECURE_PASSWORD";

const char *host = "www.yourserver.com";
const int httpsPort = 443;  //HTTPS= 443 and HTTP = 80

//SHA1 fingerprint of certificate. Use your web browser to view the SHA1 fingerprint and copy
//Reply in this discussion if you don't know how to get the SHA1 fingerprint of your HTTPS website, thanks.
const char fingerprint[] PROGMEM = "AA BB DD 7B C0 FE CF 3C A8 2B 6D 31 DB 4B 9F C3 5B 6E A0 DD"; 

void setup()
{
  // Debug serial console
  Serial.begin(9600);

  Blynk.begin(auth, ssid, pass);
  timer.setInterval(1000L, myTimerEvent);

}

void loop()
{
  Blynk.run();
  timer.run();
}

void myTimerEvent()
{
  WiFiClientSecure httpsClient;    //Declare object of class WiFiClient

  Serial.println(host);

  Serial.printf("Using fingerprint '%s'\n", fingerprint);
  httpsClient.setFingerprint(fingerprint);
  httpsClient.setTimeout(15000); // 15 Seconds
  delay(1000);

  Serial.print("HTTPS Connecting");
  int r = 0; //retry counter
  while ((!httpsClient.connect(host, httpsPort)) && (r < 30)) {
    delay(100);
    Serial.print(".");
    r++;
  }
  if (r == 30) {
    Serial.println("Connection failed");
  }
  else {
    Serial.println("Connected to web");
  }

  String Link;
  long rssi = WiFi.RSSI();
  String macaddr = WiFi.macAddress();
  Serial.print("RSSI:");
  Serial.println(rssi);
  Serial.print("MAC: ");
  Serial.println(macaddr);

  Link = "/yourAPIdirectory/?type=t&rssi=" + String(rssi) + "&mac=" + macaddr;
  Serial.print("requesting URL: ");
  Serial.println(host + Link);

  httpsClient.print(String("GET ") + Link + " HTTP/1.1\r\n" +
                    "Host: " + host + "\r\n" +
                    "Connection: close\r\n\r\n");

  Serial.println("request sent");

  while (httpsClient.connected()) {
    String line = httpsClient.readStringUntil('\n');
    if (line == "\r") {
      Serial.println("headers received");
      break;
    }
  }

  Serial.println("reply was:");
  Serial.println("==========");
  String line;
  while (httpsClient.available()) {
    line = httpsClient.readStringUntil('\n');  //Read Line by Line
    Serial.println(line); //Print response
  }
  Serial.println("==========");
  Serial.println("closing connection");

  // crude way to parse string - should convert to json later
  int ind1 = line.indexOf(':');  //finds location of first :
  String l1 = line.substring(0, ind1);   //captures first data String
  int ind2 = line.indexOf(':', ind1 + 1 ); //finds location of second :
  String l5 = line.substring(ind1 + 1, ind2 + 1); //captures second data String
  int ind3 = line.indexOf(':', ind2 + 1 ); //finds location of third :
  String l15 = line.substring(ind2 + 1, ind3 + 1);//captures second data String
  int ind4 = line.indexOf(':', ind3 + 1 ); //finds location of third :
  String bots = line.substring(ind3 + 1, ind4 + 1);//captures second data String
  int ind5 = line.indexOf(':', ind4 + 1 ); //finds location of third :
  String guests = line.substring(ind4 + 1, ind5 + 1);//captures second data String
  int ind6 = line.indexOf(':', ind5 + 1 ); //finds location of third :
  String members = line.substring(ind5 + 1, ind6 + 1);//captures second data String
  if (DEBUG) {
    Serial.println(String(l1)); Serial.println(l5);; Serial.println(l15); //Print response
    Serial.println(String(bots)); Serial.println(guests);; Serial.println(members);
  }

  if (l1.toFloat() > 0) {
    l1.replace(":", ""); l5.replace(":", ""); l15.replace(":", "");
    bots.replace(":", ""); guests.replace(":", ""); members.replace(":", "");
    Blynk.virtualWrite(V0, l1.toFloat());
    Blynk.virtualWrite(V1, l5.toFloat());
    Blynk.virtualWrite(V2, l15.toFloat());
    Blynk.virtualWrite(V3, members.toInt());
    Blynk.virtualWrite(V4, guests.toInt());
    Blynk.virtualWrite(V5, bots.toInt());
  }

}

This more-than-like will be the last Blynk app I create because, with only six gauges, I have reached the limit of the "freebies" and if I create more apps and add more widgets, I will start to have to pay for them.

I may add some "color logic" when the numbers exceed certain thresholds, otherwise I'm most "done and dusted" with this test app.

Anyway, time to move on to another Arduino module.

This app was fun, fast useful and easy to build. Recommended for sure.

Due to problems with the Blynk business model and their pricing structure, I have decided not to use Blynk for any further app development.

Unfortunately, I cannot recommend Blynk and their, what I consider deceptive, "play to pay" business model; and nor can I recommend their support community.

I also read the Blynk privacy policy and according to their privacy policy, they can provide the "behavioral exhaust" data we generate on the Blynk network to third parties.

This appears to be yet another "surveillance capitalist" -type of business, where they will partner with data miners and other third parties and use our data without our consent for behavioral-analytics.

From Blynk Terms of Use (TOS) policy:

1 Like

After looking into this, I found some promising iPhone apps which do not share your data with third parties and will test the mosquitto broker to set up a private pub/sub network to send and receive messages to and from these ESP8266 and ESP32 devices.

I have already set up a mosquitto broker on Ubuntu, the basic security authentication and can send a message from my ESP32 device to the remote Linux server. Will discuss this in another post.