Day 27: Adventures in 3D Printing for Beginners - Creating Our First macOS OctoPrint Plugin (Python)

The OctoPrint tutorial for writing OctoPrint plugins is geared toward Linux and in particular, the Raspberry PI. However what happens with you want to print directly to your favorite 3D printer directly from your mac using a USB cable?

Let's look at how to write a simple OctoPrint plugin for macOS!

To get started, this is my simple script to start OctoPrint on macOS:

macos$ cat /usr/local/bin/octostart

#!/bin/bash
cd /Applications/OctoPrint
virtualenv venv
source venv/bin/activate
octoprint serve

This script permits me to start OctoPrint in the recommended virtual environment easily and consistently.

The first thing I recommend all beginner OctoPrint plugin writers to do is to find the directories where OctoPrint searches for plugins when it starts up. You can do this by starting OctoPrint and looking at the terminal output. Approximately 15 lines (give-or-take) after OctoPrint starts, you will fine a line similar to this:

2021-09-25 17:32:42,578 - octoprint.plugin.core - INFO - Loading plugins from /Applications/OctoPrint/venv/lib/python3.7/site-packages/octoprint/plugins, /Users/Tim/Library/Application Support/OctoPrint/plugins and installed plugin packages...

In my macOS, OctoPrint tells us that it searches these two directories for plugins:

  1. /Applications/OctoPrint/venv/lib/python3.7/site-packages/octoprint/plugins
  2. /Users/Tim/Library/Application Support/OctoPrint/plugins

To make matters easy when writing a plugin, I created a symbolic link between to the second directory on my desktop. This symlink is not required but it made my life a bit easier learning to write my first OctoPrint plugin without an documentation for macOS (that I could find):

ln -sf /Users/Tim/Library/Application Support/OctoPrint/plugins /Users/Tim/Desktop/plugins 

The most important thing is to simply know where OctoPrint searches, by default, for plugins for your chosen computer setup. The location documented in the OctoPrint plugin tutorial is different for Linux-based distributions and not the mac; and this took me a bit of extra time to figure out.

Next, you can put a "Hello World" file in that location and it now be an OctoPrint plugin. I recommend you test your first plugin with this Python code from the OctoPrint tutorial:

helloworld.py

# -*- coding: utf-8 -*-
from __future__ import absolute_import, unicode_literals

import octoprint.plugin

class HelloWorldPlugin(octoprint.plugin.StartupPlugin):
    def on_after_startup(self):
        self._logger.info("Hi Neo, Hello World!")

__plugin_name__ = "Hello World"
__plugin_version__ = "1.0.0"
__plugin_description__ = "A quick \"Hello World\" example plugin for OctoPrint"
__plugin_pythoncompat__ = ">=2.7,<4"
__plugin_implementation__ = HelloWorldPlugin()

Restart OctoPrint and you should see your hello world log entry in the terminal:

2021-09-25 18:34:49,383 - octoprint.plugins.helloworld.py INFO - Hi Neo, Hello World!

This works; but the problem is that by using this method, you cannot add HTML templates and Javascript because of how Python plugins for OctoPrint are sourced. Next is how I got the plugin to work more completely. The steps are pretty simple after you figure it out, which took me a few hours to get right.

  1. Create a file in the plugin directory called setup.py which describes the meta data for the plugin, including the name of the plugin which will be used as the plugin code subdirectory..

  2. Create the subdirectory using the correct naming convention.

  3. Rename your very basic helloworld.py plugin code to __init__.py and move that code to the subdirectory created in generic step two above.

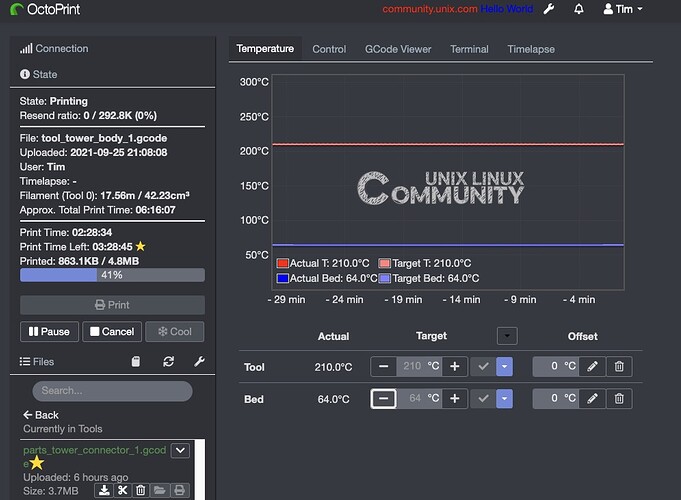
In my next post in this topic, I will describe how to do the steps above and add functionality to our "Hello World" plugin to display two links in the OctoPrint navbar and the results will look like this, with one link in red and one link in blue or any other color you desire with any text or links you want.

Please stand by for my next post in this topic where I will describe how to add functionality this OctoPrint plugin for macOS and make it a bit useful. Also, I will tell you an important "secret" on how to get your CSS changes to actually work! This will save you a lot of time, as it took me hours to figure this out!

Will be back soon with more details on creating our first OctoPrint plugin on macOS ......
We have a basic "Hello World" OctoPrint plugin installed that does nothing functional and only logs a hello world message during OctoPrint startup. The plugin is installed and working, but needs some more bells and whistles to be useful:

As mentioned my first topic, the next step is to convert the plugin to something which can be extended so we can add HTML, Javascript, Python libs, CSS and more. Let's create setup.py and put this plugin setup code in our main plugin directory where are helloworld.py code is now:

setup.py

plugin_identifier = "helloworld"
plugin_package = "octoprint_helloworld"
plugin_name = "OctoPrint-Helloworld"
plugin_version = "1.0.0"
plugin_description = """A quick "Hello World" example plugin for OctoPrint"""
plugin_author = "Your Name"
plugin_author_email = "you@somewhere.net"
plugin_url = "https://github.com/yourGithubName/OctoPrint-Helloworld"
plugin_license = "AGPLv3"

Next, create a subdirectory in the same directory as setup.py with a name that exactly matches our plugin_packag meta data in setup.py, octoprint_helloworld. Then rename helloworld.py to __init__.py and move that file to the directory we just created.

mkdir octoprint_helloworld
mv helloworld.py octoprint_helloworld/__init__.py

Our directory structure now looks like this:

macos:plugins Tim$ pwd
/Users/Tim/desktop/plugins
macos:plugins Tim$ ls -l
total 8
drwxr-xr-x  6 Tim  staff  192 Sep 26 11:24 octoprint_helloworld
-rw-r--r--  1 Tim  staff  379 Sep 25 17:06 setup.py

By creating this creating this type of directory structure for the OctoPrint plugin, we can add assets and other code to our plugin, for example Javascript, images, CSS, and HTML templates.

To make sure we know exactly where are asset and templates should be we can take advantage of OctoPrint logging and add the following to our plugin code:

self.folder = self.get_template_folder()
self.assets = self.get_asset_folder()
self._logger.info(self.folder)
self._logger.info(self.assets)

These OctoPrint Python methods (mixins) come from the OctoPrint docs and to get the methods above to work we need to also tell our plugin we are using these methods (mixin classes) as follows:

class HelloWorldPlugin(octoprint.plugin.StartupPlugin,
                       octoprint.plugin.TemplatePlugin,
                       octoprint.plugin.AssetPlugin):

So, our "Hello World" plugin main Python code now looks like this:

init.py

from __future__ import absolute_import, unicode_literals

import octoprint.plugin

class HelloWorldPlugin(octoprint.plugin.StartupPlugin,
                       octoprint.plugin.TemplatePlugin,
                       octoprint.plugin.AssetPlugin):

    def on_after_startup(self):
        self._logger.info("Hi Neo, Hello World!")
        self.folder = self.get_template_folder()
        self.assets = self.get_asset_folder()
        self._logger.info(self.folder)
        self._logger.info(self.assets)

__plugin_name__ = "Hello World"
__plugin_version__ = "1.0.0"
__plugin_description__ = "A quick \"Hello World\" example plugin for OctoPrint"
__plugin_pythoncompat__ = ">=2.7,<4"
__plugin_implementation__ = HelloWorldPlugin()

After restarting OctoPrint we will see two additional log entries along with our "hello world" message in the terminal:

2021-09-25 19:50:19,227 - octoprint.plugins.octoprint_helloworld - INFO - Hi Neo, Hello World
2021-09-25 19:50:19,228 - octoprint.plugins.octoprint_helloworld - INFO - /Users/Tim/Library/Application Support/OctoPrint/plugins/octoprint_helloworld/templates
2021-09-25 19:50:19,228 - octoprint.plugins.octoprint_helloworld - INFO - /Users/Tim/Library/Application Support/OctoPrint/plugins/octoprint_helloworld/static

This information tells where our templates and static assets will reside.

These values are the default. However, it is a good idea to check them because we don't want to spend time debugging why our plugin did not find the assets and templates we will add to our plugin.

After creating these two important directories, our plugin main subdirectory looks like this:

macos:octoprint_helloworld Tim$ pwd
/Users/Tim/desktop/plugins/octoprint_helloworld
macos:octoprint_helloworld Tim$ ls -l
total 8
-rw-r--r--  1 Tim  staff  1143 Sep 25 19:51 __init__.py
drwxr-xr-x  3 Tim  staff    96 Sep 25 19:51 __pycache__
drwxr-xr-x  3 Tim  staff    96 Sep 25 19:50 static
drwxr-xr-x  3 Tim  staff    96 Sep 25 19:49 templates

Note that when we run our plugin, the __pycache___ directory is automatically created. I recommend that you delete this directory after you make changes to your assets (for example add more make changes to a Javascript file) to insure there are no unwanted artifacts in your plugin cache.

We are now ready to add functionality to our beginners OctoPrint plugin.

In the next post, I will demonstrate the Python code and Javacript (jQuery) assets required to add some colorful links to the OctoPrint navbar.

We are almost done with our first OctoPrint plugin on macOS.

As you might have noticed, this topic assums that readers of this topic:

  1. Already have OctoPrint installed and up-and-running on macOS and connected to their 3D printer via USB.
  2. Have not written an OctoPrint plugin before.
  3. Your have installed the Themeify plugin which gives us the "dark mode" look.

To add some functionality to our "Hello World' plugin, we will add two links to the navbar and style these links. We will do this in two steps:

  1. Add an HTML template to the plugin to display the links.
  2. Add some jQuery to style the links.

Here we go!

macos:templates Tim$ pwd
/Users/Tim/desktop/plugins/octoprint_helloworld/templates

macos:templates Tim$ ls -l
total 8
-rw-r--r--  1 Tim  staff  163 Sep 25 19:48 octoprint_helloworld_navbar.jinja2

macos:templates Tim$ cat octoprint_helloworld_navbar.jinja2
<div class="hw"><a class="nav1"  href="https://community.unix.com">community.unix.com</a> <a class="nav2"  href="https://community.unix.com">Hello World</a></div>

We also need to style these links.

Here is a tip which will save many readers a lot of time.

After a few hours of having trouble with styling the links with CSS, I found that some Javascript bundled with OctoPrint was overriding many CSS stylesheet parameters, for example color. After I discovered this undocumented feature, I decided to ditch creating CSS stylesheets and do all the CSS changes in jQuery. After that decision, styling was very easy!

Create a js subdirectory under static and then add jQuery code similar to this, but choosing your own color and spacing:

$( document ).ready(function() {
    $(".nav1").css("color","red");
    $(".nav2").css("color","blue");
    $(".hw").css("margin-top","10px");
});

Our directory structure is now:

macosstatic Tim$ pwd
/Users/Tim/desktop/plugins/octoprint_helloworld/static
macos:static Tim$ ls -l
total 0
drwxr-xr-x  3 Tim  staff  96 Sep 25 19:49 js

Then cd into js, to view where we are now:

macos:static Tim$ cd js
macos:js Tim$ pwd
/Users/Tim/desktop/plugins/octoprint_helloworld/static/js

macos:js Tim$ ls -l
total 8
-rw-r--r--  1 Tim  staff  148 Sep 25 19:49 helloworld.js

macos:js Tim$ cat helloworld.js
$( document ).ready(function() {
    $(".nav1").css("color","red");
    $(".nav2").css("color","blue");
    $(".hw").css("margin-top","10px");
});

There is one critical step left to do, we must tell OctoPrint where these assets are and register them in __init__.py as follows:

def get_assets(self):
        return dict(js=['js/helloworld.js'])

and so our final beginners "Hello World" __init__.py script now looks like this:

# -*- coding: utf-8 -*-
from __future__ import absolute_import, unicode_literals

import octoprint.plugin

class HelloWorldPlugin(octoprint.plugin.StartupPlugin,
                       octoprint.plugin.TemplatePlugin,
                       octoprint.plugin.AssetPlugin):

    def on_after_startup(self):
        self.folder = self.get_template_folder()
        self.assets = self.get_asset_folder()
        self._logger.info("Hi Neo, Hello World")
        self._logger.info(self.folder)
        self._logger.info(self.assets)

    def get_assets(self):
        return dict(js=['js/helloworld.js'])

__plugin_name__ = "Hello World"
__plugin_version__ = "1.0.0"
__plugin_description__ = "A quick \"Hello World\" example plugin for OctoPrint"
__plugin_pythoncompat__ = ">=2.7,<4"
__plugin_implementation__ = HelloWorldPlugin()
__plugin_identifier__ = "helloworld"
__plugin_package___ = "octoprint_helloworld"

Of course, you can comment out some of the logging if you want, or delete the logging if you wish:

# -*- coding: utf-8 -*-
from __future__ import absolute_import, unicode_literals

import octoprint.plugin

class HelloWorldPlugin(octoprint.plugin.StartupPlugin,
                       octoprint.plugin.TemplatePlugin,
                       octoprint.plugin.AssetPlugin):

    def on_after_startup(self):
        #self.folder = self.get_template_folder()
        #self.assets = self.get_asset_folder()
        self._logger.info("Hi Neo, Hello World")
        #self._logger.info(self.folder)
        #self._logger.info(self.assets)

    def get_assets(self):
        return dict(js=['js/helloworld.js'])

__plugin_name__ = "Hello World"
__plugin_version__ = "1.0.0"
__plugin_description__ = "A quick \"Hello World\" example plugin for OctoPrint"
__plugin_pythoncompat__ = ">=2.7,<4"
__plugin_implementation__ = HelloWorldPlugin()
__plugin_identifier__ = "helloworld"
__plugin_package___ = "octoprint_helloworld"

Naturally, we must restart OctoPrint when we make these changes.

In the next post on this topic, I'll summarize and add some thoughts,

Footnote

Before my final summary, let me share with you some "bare bones" meta data experimental results.

First, I deleted all the meta day from setup.py, but left the file in place.

The, I sysomatically deleted the meta data in __init__.py and found that the bare mimium meta data required for a "non for distribution" OctoPrint plugin, is:

__plugin_pythoncompat__ = ">=2.7,<4"
__plugin_implementation__ = HelloWorldPlugin()
__plugin_identifier__ = "helloworld"
__plugin_package__ = "octoprint_helloworld"

Even without the following meta data, the plugin will register:

#__plugin_name__ = "Hello World"
#__plugin_version__ = "1.0.0"
#__plugin_description__ = "A quick \"Hello World\" example plugin for OctoPrint"

As you can see OctoPrint will take the name of the __plugin_package__ and use this as the name of the plugin versus a given named string.

I also found it interesting that setup.py can be empty (but must exist) and the meta data will be extracted from the __init__.py file.

Next post in this topic, will be my final thoughts and summary on my first OctoPrint "Hello World" plugin on macOS.

Final Thoughts on OctoPrint plugin development "Hello World" for macOS.

Here are some bullet points from this experience:

  • The OctoPrint documentation assumes either Linux or Rasberry PI as the OS. I could not find any docs on how to write a plugin for OctoPrint running on macOS.

  • Logging the output of methods like get_template_folder() and get__assets_folder() can save developers a lot of time because we can see exactly where OctoPrint wants these directories to be.

  • OctoPrint uses jQuery to manipulate the DOM and this jQuery code overrides many CSS attributes from plugin style sheets. I found it was better to avoid CSS stylesheets completely and just manipulate CSS attributes using jQuery code in the plugin.

  • With this information I have provided, just about anyone with minimal Python skills can start to write simple OctoPrint plugins for personal use on macOS. I have not gone though the steps to bundle this code and upload to GitHub because that was not the goal of this topic.

  • The goal of this topic was to save makers a lot of time if they want to connect their 3D printer directly to macOS and develop an OctoPrint plugin, since the documentation (that I could find) does not cover this topic.

As mentioned, this is not difficult. Anyone with minimal Python skills can do what I just did. I took me a few hours to go from never developing an OctoPrint plugin to getting this working, even without macOS specific docs and issues with CSS being overridden by OctoPrints jQuery and other JS web bundle(s).

If anyone has any questions, please feel free to ask, including @SDohmen.

See Also:

https://docs.octoprint.org/en/master/plugins/

Note: If anyone would like for me to make this plugin "for distribution" and upload it to GitHub, let me know. Otherwise, I don't plan to distribute this code as an "official" downloadablt OctoPrint plugin, since it does very little from a functional perspective and all the code is already in this topic (above).

2 Likes

Prologue:

After working on this first "Hello World" OctoPrint plugin, developing on macOS, I found this nice OctoPrint navbar app, which is actually useful:

:slight_smile: :slight_smile: